
This is a quick step by step guide to increasing the max temp on Alex's Aquila firmware. Below I have attached a compiled version of this firmware which is ManualMesh-4x4-N32 with a hot end Max Temp of 350c.
Disclaimer: Downloading and installing any firmware is always a risk to your printer, and in this case because of the drastic increase in temperature, to your surrounding environment. We have talked before about the safety precautions that need to be taken in regards to temperature and you very eloquently detailed all the measures you have taken and seem knowledgeable about this endeavor. With that in mind you assume any and all risk associated with this firmware whether it be to the software or the physical location the printer is situated in. Please be safe!
I am starting within PlatformIO which is an extension you must download and add onto Microsoft Visual Studio Code. Below is what this project looks like when we are working on it.

The columns to the left are part of PlatformIO. They show all the folders that we are working within. In this case I have downloaded firmware Source Code from Alex's github page and we are working on the files within that folder system. The source code is set up for the Aquila in a very 'vanilla' way. It has all the base hardware specifications(like stepper motor information) and printer build information(build size,temperature, etc). From this 'vanilla' version we can prune some elements to fit our needs. Some of these elements would be adding a BL Touch, increasing the hot end max temperature, increasing the build size, and other things we may want unique to our specific machine.
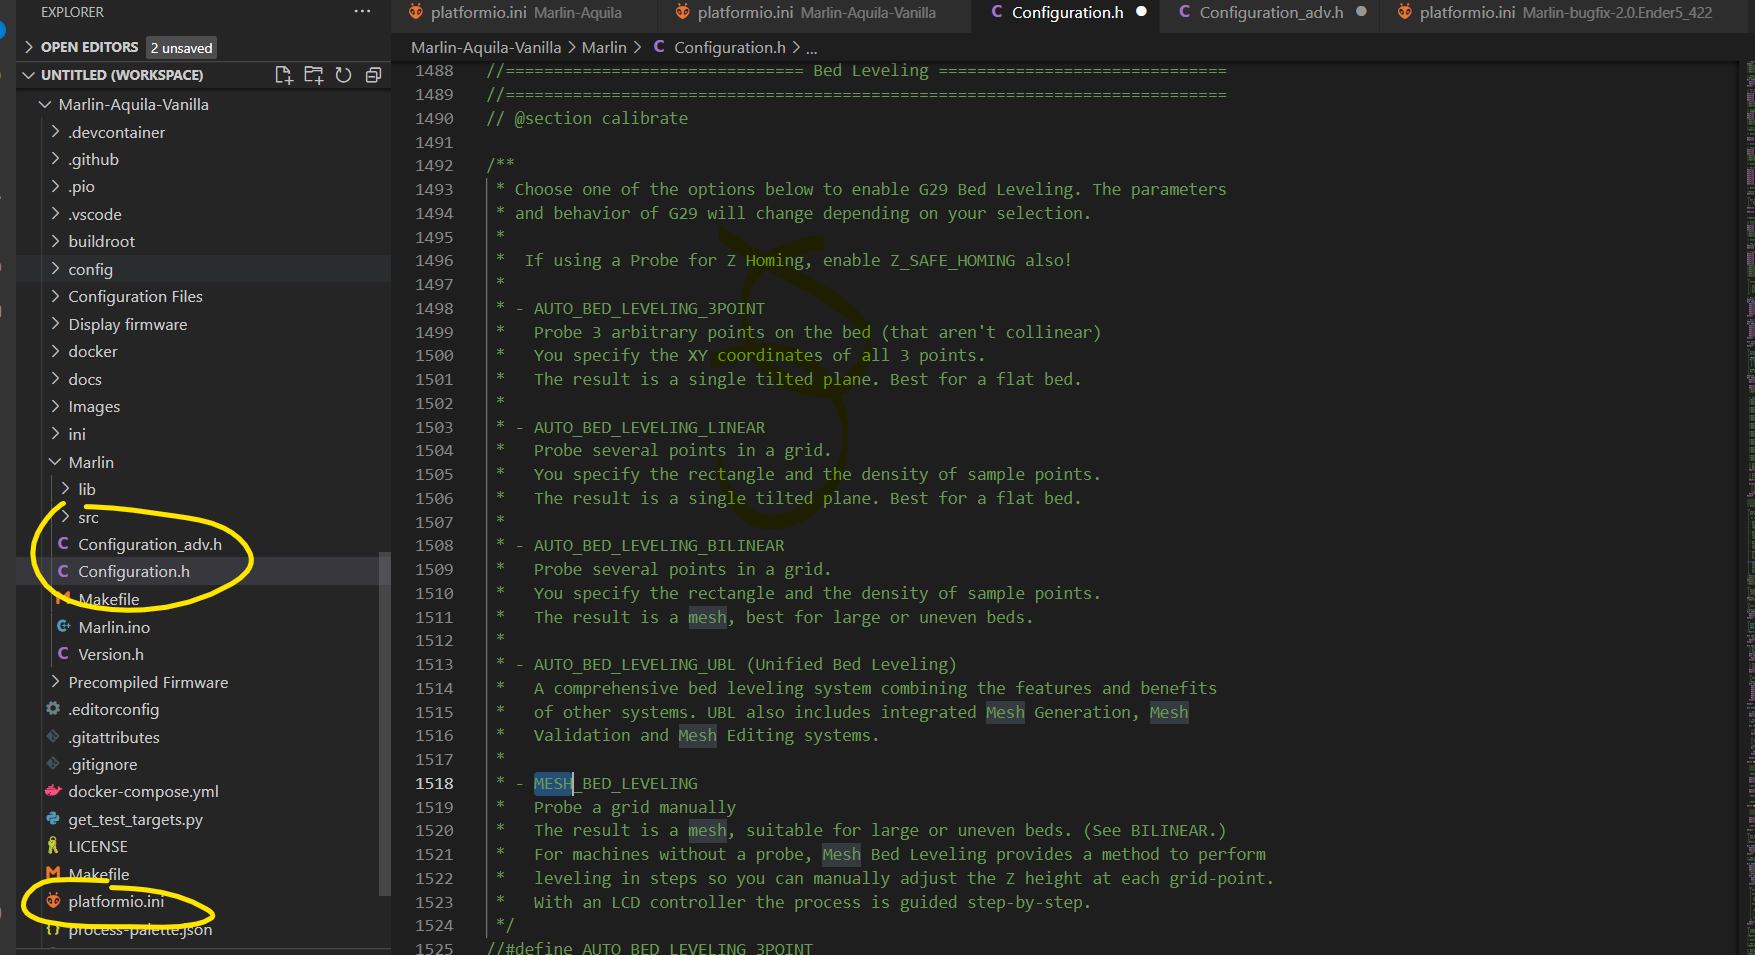
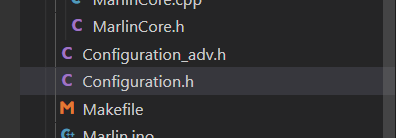
There are 3 sections I have circled here and those are the 3 files we will edit. No matter what we are doing to the firmware we will very rarely be making any changes to any other file or folder within this code. The two at the top are:
Configuration_adv.h
Configuration.h
These files are what house the majority of the firmware and this is where we will make edits, additions, and changes. Knowing which file you need to work in for a specific task is not readily apparent and will come from experience and some diligent Googling. For our purposes here, which is increasing max temperature, we will only be working within configuration.h
The circled file below these two is:
platformio.ini
This file is what determines what mainboard you are saving your file to and it needs to match the board that your printer has as well as the environment. More on that towards the end when we need it. Let's start in configuration.h
Configuration.h
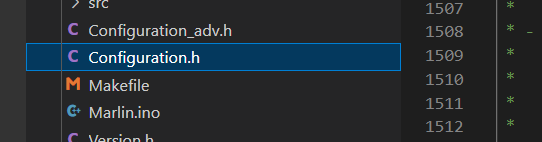
Once you click on this file it will open on the right side and you will be looking at the code for the firmware. In order for us to change our max temp we really only need to change a single variable and that is HEATER_0_MAXTEMP. That variable is what controls the temperature for the hot end. There's almost 3,000 lines of code in this file, so the easiest way of finding anything is to use the find feature (CTRL+F for pc) in order to bring up the search panel. Then input maxtemp

You'll see there are 15 different hits for this word, so we can start cycling through them until we find what we are looking for.
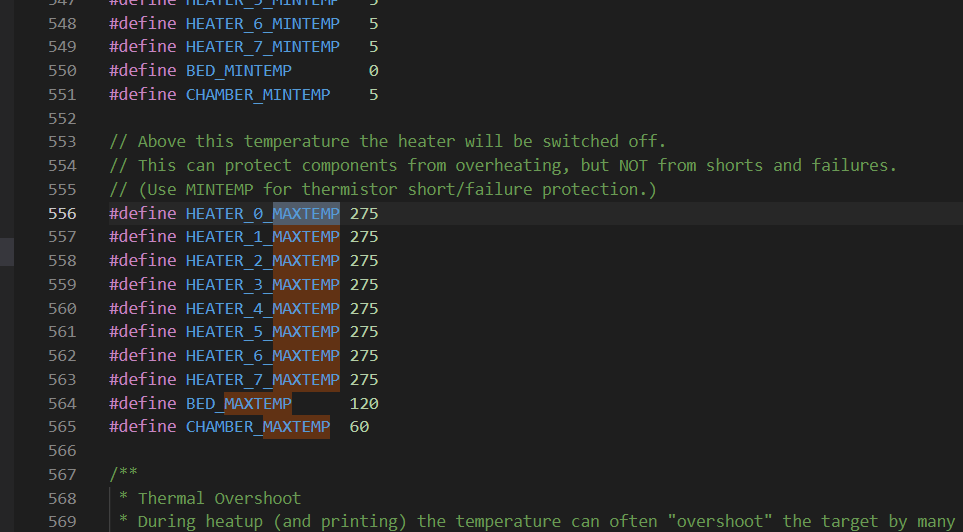
Almost immediately we found it. All we need to do now is change 275 to what we want our new max temp to be plus, 15. Why are we adding 15 degrees? There is a section below called thermal overshoot, which allows the printer to go above the MAX temp by that number.

By default it's at 15 and that's a standard number. The reason this exists is that while heating up the printer will rarely hit the desired temperature directly on the spot and maintain heat. It will usually 'overshoot' the target by some degrees and then after a few moments settle the temperature at the desired level. In the example of a Base Aquila, if we chose to heat the hotend up to 260c (which is the max temp allowed), and while it was heating it hit 261c the printer would shut the temperature systems down. That obviously is not ideal. Thermal overshoot compensates for that degree of overshoot, while still maintaining a safety measure if the hot end does start heating erratically(15 degrees above max temp).
So all this is a long winded way of saying if we want the MAX TEMP to be 350c we need to edit the MAXTEMP to be 365 in the firmware.

That's it for the edits, we can now compile our firmware. This is where the platformio.ini file and our 'environment' come into play.

We click on the platform.ini file and it opens on the right side of the screen. The only thing in this file we are concerned with is the default_envs variable and it's right at the top.
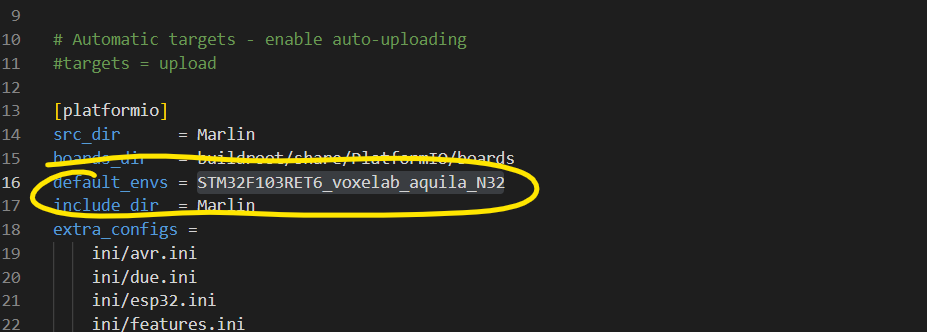
For the Aquila, because of the chipset issue this could be a few different environments. I believe when I initially downloaded the firmware it was set up for the G32 chip. That looks exactly the same, just _N32 is changed to _G32. We have the correct environment for our board and we need to make sure we are now saving it to the right environment on the computer we are working on. The environment we are saving to is found at the bottom of the screen

This step trips a lot of people up. If you open more than one firmware within PlatformIO the environment you're saving onto your computer will not change, and you need to change it yourself. The environment does not only have to be an exact match of the one found in the above file, but it also has to be within the correct folder we are working on. In my case I have saved this firmware a few times so it is the right environment, but I will walk you through how to choose the correct environment if it's not there already.
The first thing we want to do is copy the environment from this page.

Then left click on the env section at the bottom of the page

(I changed the environment to something incorrect for this example)
When you do this a dropdown will appear at the top of the page.
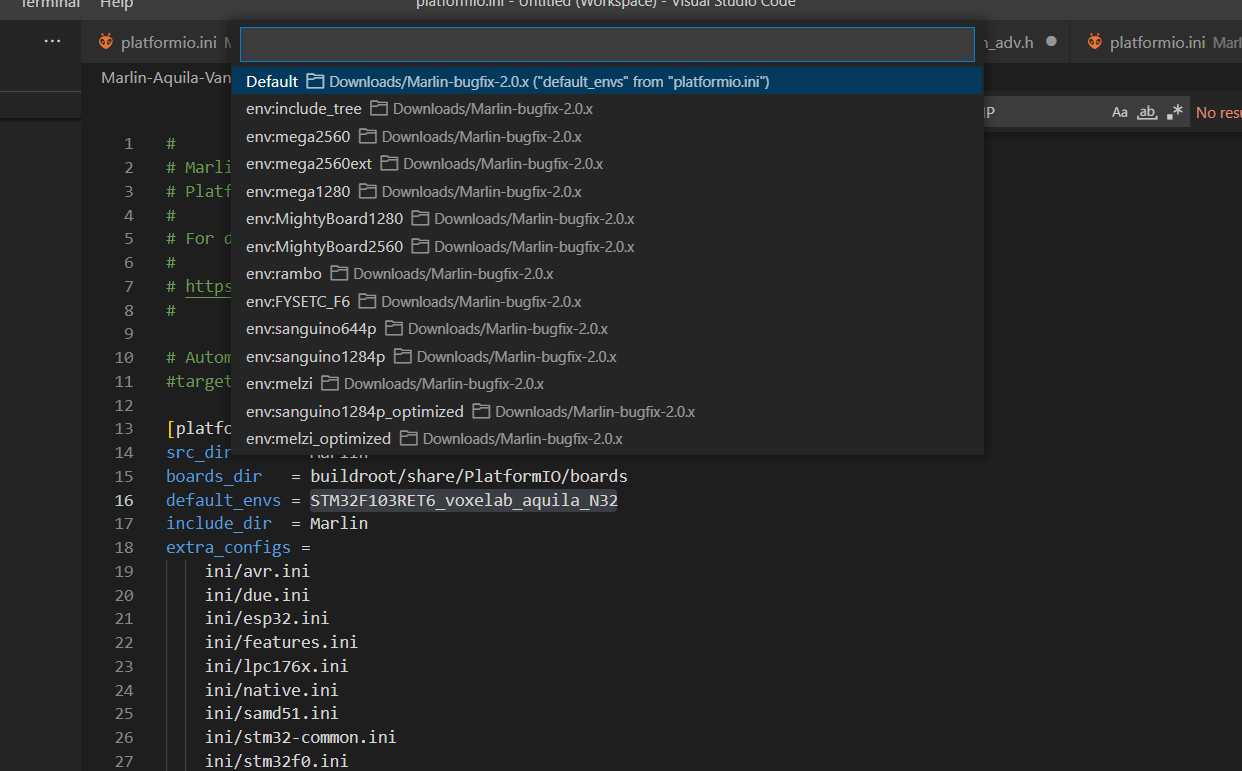
paste in the environment you copied from the platformio.ini file within the search bar

When you do this the search populates all the available locations on your computer. From here you need to choose the correct ROOT folder you are working from. When we pasted the environment into the search bar it looked through all the files on our computer to find the folders it's housed in. In my case it found 3 because I downloaded this source code 3 different times and I have 3 different folders on my computer. You will likely only have one. It's not complicated though, I know that I named the folder we are working in "Marlin-Aquila-Vanilla"

It's the folder at the bottom, so I select that.
That's it! I have the correct environment selected within platformio.ini and I have chosen the correct environment on my computer, so when the firmware gets compiled that's the folder it will be going to.
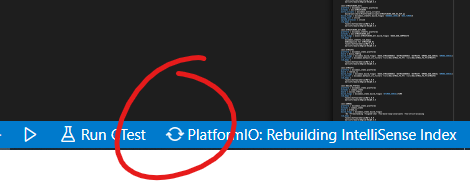
Next we compile.

Just left click this check mark. Keep in mind if you just selected a new environment there may be a spinning circle somewhere along the bottom of platformio that indicates it's building new libraries, and you will get error messages when trying to compile if you don't let that process finish. Usually takes a minute or two but once it's done click the checkmark and compile.
The Terminal should pop up and start giving off information about the compiler.

WHITE text is PlatformIO doing its thing, YELLOW text is just a reminder, usually a sanity check for certain settings, but you won't normally need to pay too much mind to it. RED is an error and it will stop the compile. The error messages are fairly detailed though and reading it should lead you down the path of the error to be resolved.

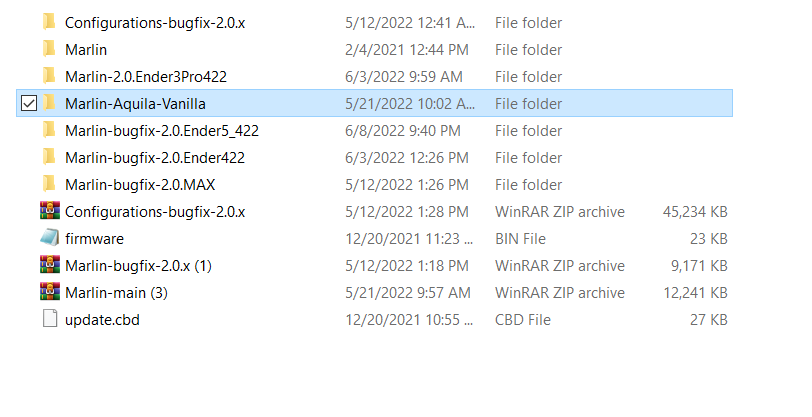
If all goes well you'll get the GREEN text which means the compile worked! Now we need to grab the firmware, so it's off to the folder! We can now close down PlatformIO and navigate to the folder we just saved the firmware into.
Here I have selected the folder that houses all my code, it's labeled Marlin-Aquila-Vanilla. It's likely yours will be named something different, you can rename it to your heart's desire to make it easier to locate for you.
Within that folder we are looking for a folder named '.pio'

Inside .pio we need to open a folder named 'build'

Then within the build folder there should be a folder named after the environment we chose before compiling. Here it is STM32F103RET6_voxelab_aquila_N32
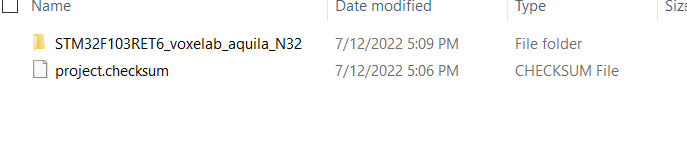
Finally inside that folder you will find your firmware. It will be of the file type BIN
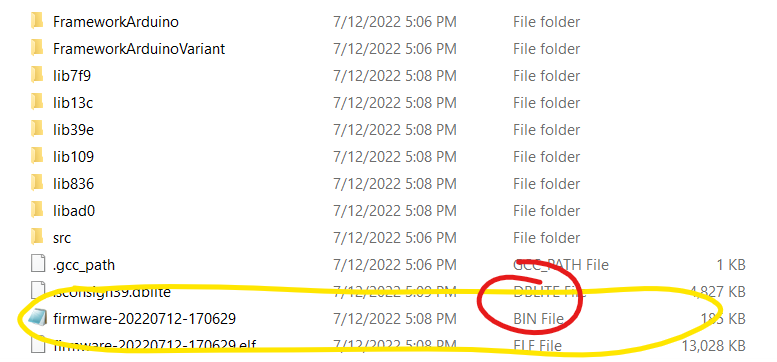
There's the firmware. Now we need to install it.
Grab an SD card, make sure it is empty (formatted FAT32 allocated 4096 BYTES), then on the SD card create a folder named 'firmware' and copy and paste this BIN file into the folder. Eject it from your computer and insert it into a powered down printer. Turn the power on and wait about 30 seconds and the boot screen should load and you should have successfully installed new firmware. Check the allowable Max temp to be sure, be safe, and have fun! Happy Printing!
If you want to watch a video version on installing new firmware you can start watching my BL Touch install video at the 20 minute mark.
In this portion of the tutorial we are going to activate our BL Touch (CR Touch, clone, etc) within the firmware. Just like when we tried to adjust our temperature our journey starts within the Configuration.h file (remember we should only ever have to edit the configuration.h, configuration_adv, and platform.ini files).
Once inside the configuration.h we can start searching for keywords and making our edits accordingly. In this portion we will be looking to add our auto bed leveler, and these are the following variables we will be looking to amend:
AUTO_BED_LEVELING_BILINEAR
BLTOUCH
Z_SAFE_HOMING
USE_PROBE_FOR_Z_HOMING
MULTIPLE_PROBING
GRID_MAX_POINTS_X (+ _Y)
The first word we are going to search is auto_bed_leveling_bilinear
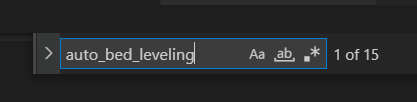
As you can see there are 15 hits for the word, the entry we are looking for is the following:
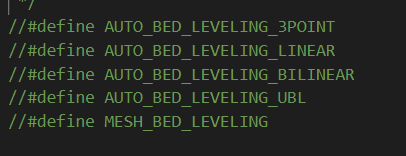
In this block of text we are given 5 different options for bed leveling. Currently all these options are undefined or "commented out". What that means is all of these lines are DISABLED and will not be read by the computer during the compiling process. They will be skipped over entirely and have no impact on the final firmware. The way we comment out sections is by adding two forward slashes (//), and anything to the right side of the slashes will be commented out. The reason it is called "commented out" is because this method is also used for people to leave comments within the code, so that others unfamiliar with certain sections can read a block in plain language and understand what's going on without having to decipher code. In my version of Visual Studio Code all commented out sections appear green. For the rest of this tutorial anything commented out will be referred to as 'Undefined'. We want to now ENABLE or 'define' the line: AUTO_BED_LEVELING_BILINEAR, we do this by removing the two slashes before the line.

The color of the text should now change (for me it goes from green to purple/blue) meaning this line of text is now ACTIVE. Going forward as we 'activate' these lines I will refer to them as being DEFINED. Now that this line is defined we can move onto the next variable in our list:
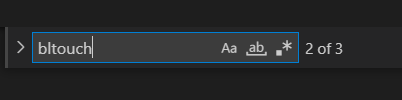
We use the search by word function(ctrl+f on PC) again to find this line for the BL Touch


This line is again undefined and we need to define it. Remember all we need to do is remove the forward slashes that precede the line.
There we go, our second variable is defined and we can keep moving forward. On to Z_SAFE_HOMING

and we are looking for this section of the code.

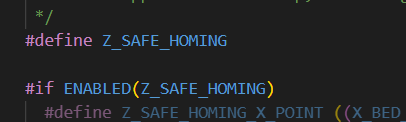
z_safe_homing moves the nozzle to a defined X and Y location before it homes the Z. This is meant to be a safety feature so the nozzle doesn't attempt to home off the bed and damage any components. We need to define this feature and then set up the X and Y coordinates for the homing. First define z_safe_homing
and then below that you can input your prefered homing location. I believe this is the standard X and Y location, but if yours differs I recommend entering the following as it will use the center of the bed for Z homing.

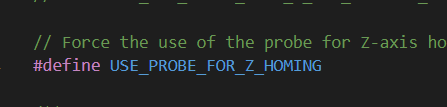
Next search for the line use_probe_for_z_homing and find the following block of text.

It's possible when you come upon this section the line Z_MIN_PROBE_USES_Z_MIN_ENDSTOP_PIN will be defined. If that is the case undefine it by commenting it out. We want to define the line USE_PROBE_FOR_Z_HOMING. This line has to do with what ports on the mainboard are receiving the signal for our z probe, which is now the bl touch. In earlier versions of Marlin you would have to navigate to a few lines below this section and enter in the actual pins numbers where the bl touch was plugged in, but newer versions of Marlin have omitted that requirement and all we need to define is use_probe_for_z_homing
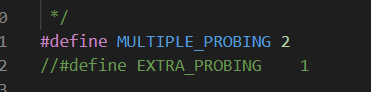
We are almost done activating our BL Touch and now we will add a few more features that will add to the overall accuracy and experience of our BL Touch. We are searching for next multiple_probing

and we are looking for this section of the code
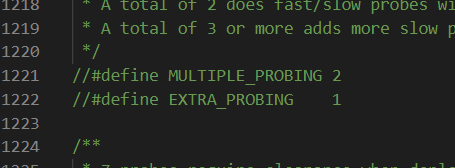
While probing the bed we have the option for the probe to touch down on each point more than one time. This is referred to as Multiple Probing. With multiple probing the ABL will touch down more than once at each point (one fast movement and then one slow movement) and then it will give a weighted average of the result. This should result in more accurate bed meshes and overall better prints. It is not necessary that we define this section but I highly recommend it as there is very little extra time taken and the overall benefit is well worth it. Also the bigger the build plate the more likely you will be to need this. Now we can define it.
If you want to increase the number of probes you can, just keep in mind every probe after the first one will be slow and thus add more time to create a bed mesh. Next we will decide how many overall points we want our printer to probe while it creates a new mesh. I would say 4x4 is standard for the Aquila's bed size of 220x220, but I usually choose a 5x5 or 6x6 grid personally. The more points should give you a more accurate mesh but will also take a longer time to complete. Because I don't run a probing mesh before each print (more on that below) the amount of added time doesn't concern me. Let's look for this now by searching grid_max_points_x.
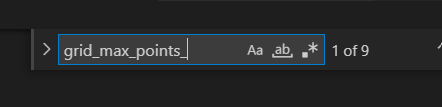
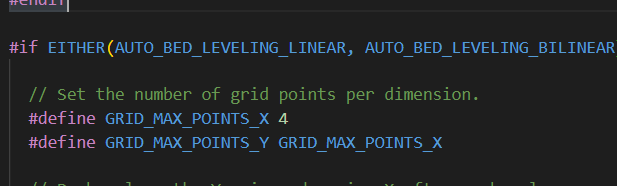
Specifically looking for this entry.
For our build plate I recommend using the same number of X and Y probing points. In this example the probing grid will be 4x4. I have the probing points in the X direction as 4 and then below that I have the grid_max_points_y set to copy the same number of probing points in the X direction. I want to create a 6x6 probing mesh so I make the change accordingly.

Here I have set the X points to 6, and below that the Y points will copy the X, which will also be 6.
Just like that we are finished! Those are all the necessary variables we need to define in order to get a working copy of BL Touch enabled firmware for our Voxelab Aquila. You can now navigate to the section about compiling the firmware and finish this up!
As far as how and when your printer will go through its probing sequence, there are two ways.
M420 S1 - You can probe outside of a print, save that information, and then before a print starts the printer will call on that information and use it. This happens instantaneously which saves time, but you won't be getting the most up to date mesh possible.
G29 - You can choose to probe your bed before each print and the printer will immediately use the new data. This results in a more accurate bed mesh but it also will add more time to each print.
After deciding which option you like best you can insert the appropriate command into your starting Gcode, this is done through your Slicer. Navigate to the Machine Settings in your slicer, and then to the START GCODE section. In this section you can add any code for the printer to read and execute before the print starts. Whichever method you choose it's important to insert it after any calls to G28. If the G28 command is anywhere below the probing commands the probing commands will be overridden and no mesh data will be used. The two gcodes to insert are:
G29 - probe before each print
M429 S1 - Probe outside of a print and recall the data.
Remember you will only choose one of the above commands and make sure no instance of G28 (auto home) appears anywhere after one of these or it will be invalidated.