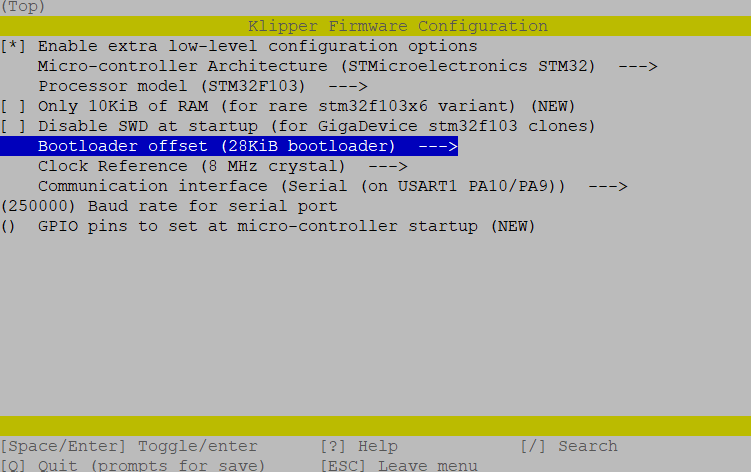
The mainboard of the Voxelab Aquila comes in 3 different varieties and the feature that sets them apart is the mainboard chip. The options are a STM32/G32, N32 and H32 chip. Newer models of the Aquila should have a sticker on the upper portion of the electronics box (under the heated bed) that displays the chip within the mainboard. However, if this sticker is not present, the only way to verify which chip your mainboard has (thus verifying which firmware to download), you need to physically inspect the mainboard for the manufacturer of the chip.
STM32f103ret6 = STM32
GigaDevice32= G32
NationTech = N32
??? = H32
Below are the different Klipper firmware images for all the different chips available. If you are building your own firmware, just match your build up to the photos.
If you need help creating a firmware image go to 30:00 of THIS VIDEO for instructions on how.
However if you don’t want to build your own firmware and instead prefer to just download the image I have also included the same images for download! In either case once you procure the firmware.bin (firmware image) you need to flash it onto your Aquila and the normal flashing techniques apply:
Format an SD CARD FAT32/4096 bytes allocation, then create a folder on the SD CARD named ‘firmware’ (spelt that exact way), then paste the firmware.bin into the ‘firmware’ folder (making sure to make the file name of the actual firmware unique, as the printer will not accept the firmware if it previously flashed a file of the same name). Load the SD CARD into your 3d printer and power it on. After 30 seconds the firmware install should be complete and you can remove the SD CARD.


