RepRack
filament Storage by
Repkord
May 5th, 2022
I’ve had a filament storage issue for a while. Whether it was leftover spools from projects or a group of spools I bought on sale, my collection of filament was increasing while my storage was not. After tripping over spools for months I decided to look into some solutions, but the ones I found never really fit the bill for me. The answers were usually some cabinet style system, that not only cost a lot of money but require a lot of space. Another solution I found was storage buckets or containers. The benefit these provide is filament can be kept out of the open air, where they are exposed to possible humidity. However, being unable to see the colors or materials, and having them not readily accessible because of the stacking nature of containers, did not appeal to me. I finally was going to buy a cabinet to store filament when I stumbled upon the RepRack system by Repkord. It’s a simple system that’s mostly 3d printed and completely open source, and because its wall mounted you’re able to use the ‘dead space’ within the room that is normally unusable. The biggest knock against RepRack is that the filament spools will be kept completely out in the open air. For me that was no problem, as the room I am storing these in is humidity controlled, but it’s certainly a factor you’d have to consider.
The Setup
After settling on the RepRack system the first thing I had to do was find an open spot to use as a mounting area. Because the entire system is suspended from the wall I could choose a location that is up and out of the way. I found a blank wall that, besides having a light switch, didn’t really serve any other purpose, it was the perfect spot to start mounting my filament. The next hurdle came in the form of the wall itself. My walls are hollow sheetrock(nothing behind it) and they don’t use wooden studs. So I had to hang this Rack directly from the sheetrock. This is a good thing and a bad thing. It’s bad because sheetrock is not known for its load bearing capability - as a matter of fact it’s known to be quite fragile and unable to withstand a lot of stress - but it’s good because I had to trial run this, and show that you can make it work! The answer to the wall problem is of course anchors. I needed to find the right fastener that would hold within the sheetrock but also hold tight onto the screws that are supporting the cleats. For this I took a trip to my local hardware store to procure the few non-printable parts for this project.
The Non-Printable Hardware
--
The Non-Printable Hardware --
TOGGLE BOLTS:
I found these Toggle Bolts as an answer for holding the Rack against the wall, and they worked better than expected. Toggle bolts are a 2-piece system. The first piece is the bolt that goes through whatever you are holding up -in our case a 3d printed wall cleat- The second part is the ‘butterfly’ or ‘toggle’. The toggle is a spring loaded trap that gets threaded onto the bolt. The trap is compressed and inserted into a pre-drilled hole. Once on the other side of the wall the trap opens. The bolt is then tightened down and in doing so pulls the open trap against the wall securing it from shifting or moving. This is what holds and stabilizes the RepRack system. These toggle bolts worked well for me on my small (2ft) section of Rack, but keep in mind the distance and weight your shelf will be sustaining before considering these. I was unable to find any sort of weight capacity online for these toggle bolts but I can attest to a two foot(8-spool) rack being held perfectly in place. I used the 3/16” x 3” bolts.
FILAMENT HOLDING RAIL:
Also while at the hardware store I needed to find a rod to go through the hangers for the filament spools to rest on. I purchased a 10 foot section of ½” emt pipe, which Repkord recommends. The pipe does not need to be hardened steel, and in fact some people have used pieces of wooden dowel for this purpose. Whatever you decide on, make sure it will fit within the inlet and outlet holes of the 3d printed hangers (½”), and won’t bend under the weight.
The Printable Items
--
The Printable Items --
CLEAT:
This is the wall bracket that holds the hanger. This piece will be affixed to the wall through the two screw holes.
HANGER:
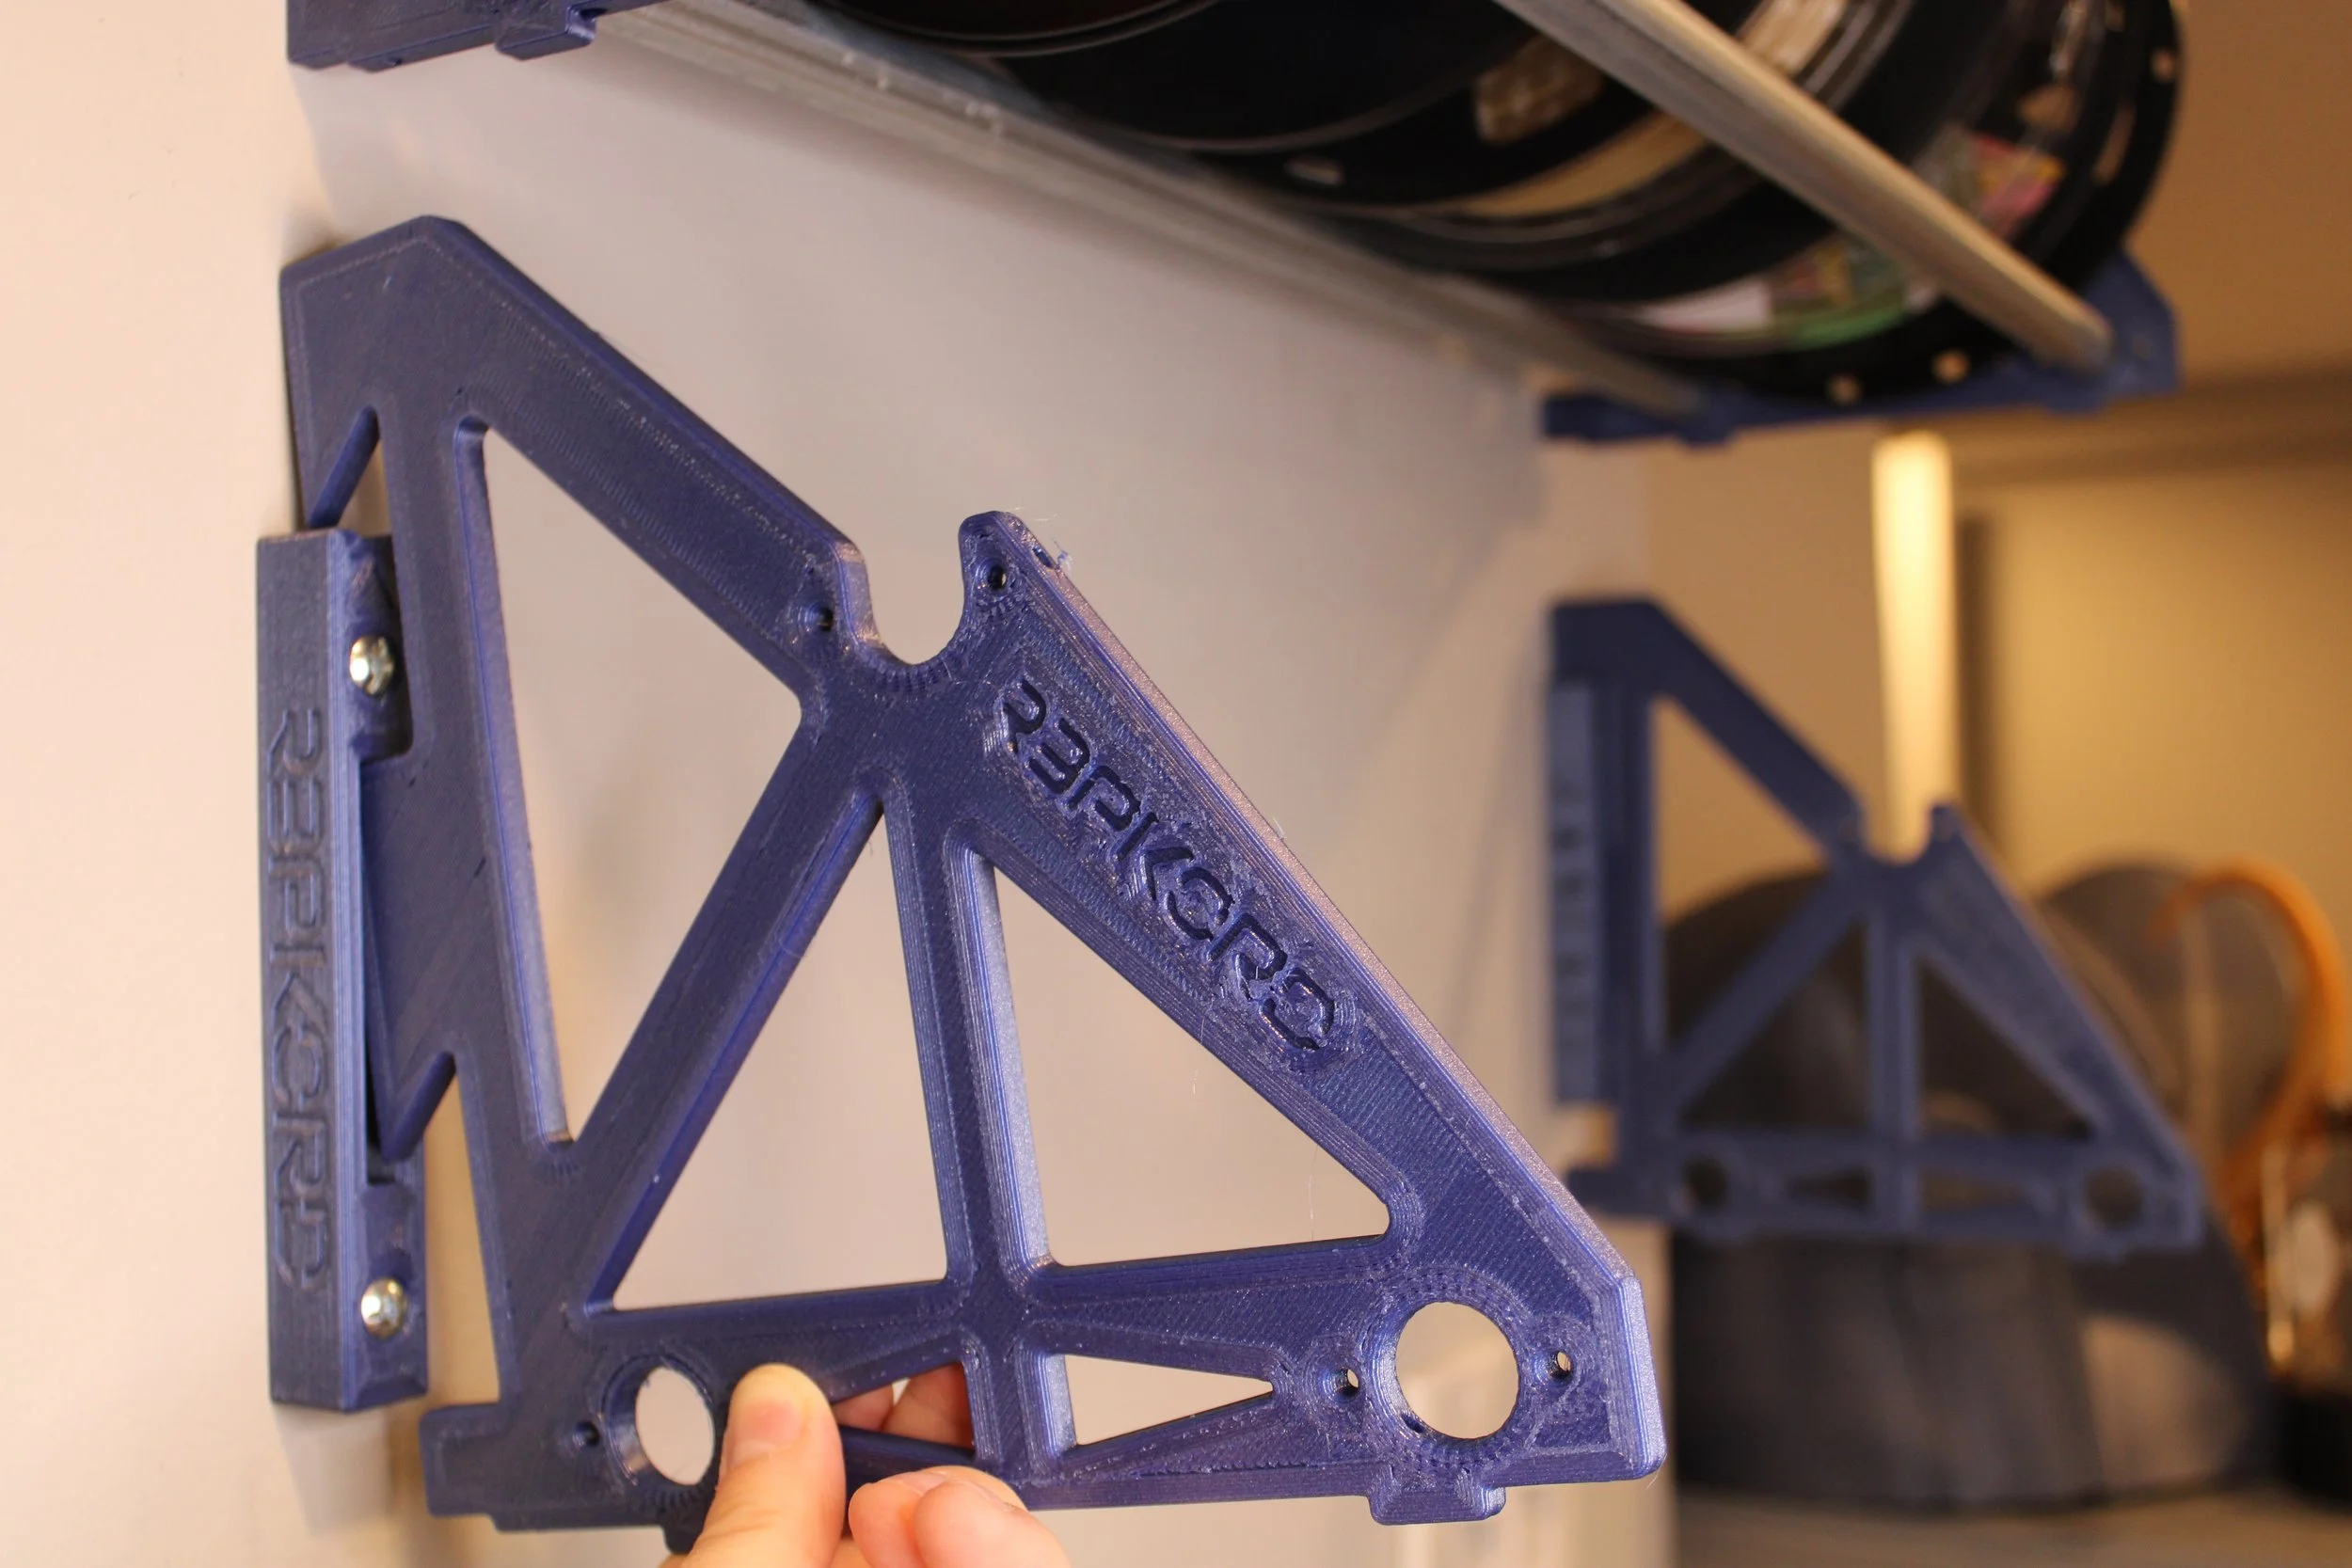
This piece rests within the cleat, and then a rod is pushed through the two bottom holes to suspend the filament.
ROD CLAMP:
I didn’t end up using this piece in my setup. It’s meant to be affixed to the outside (or inside) of the hanger with screws. Then two more screws go through this to hold the rod onto the hanger.
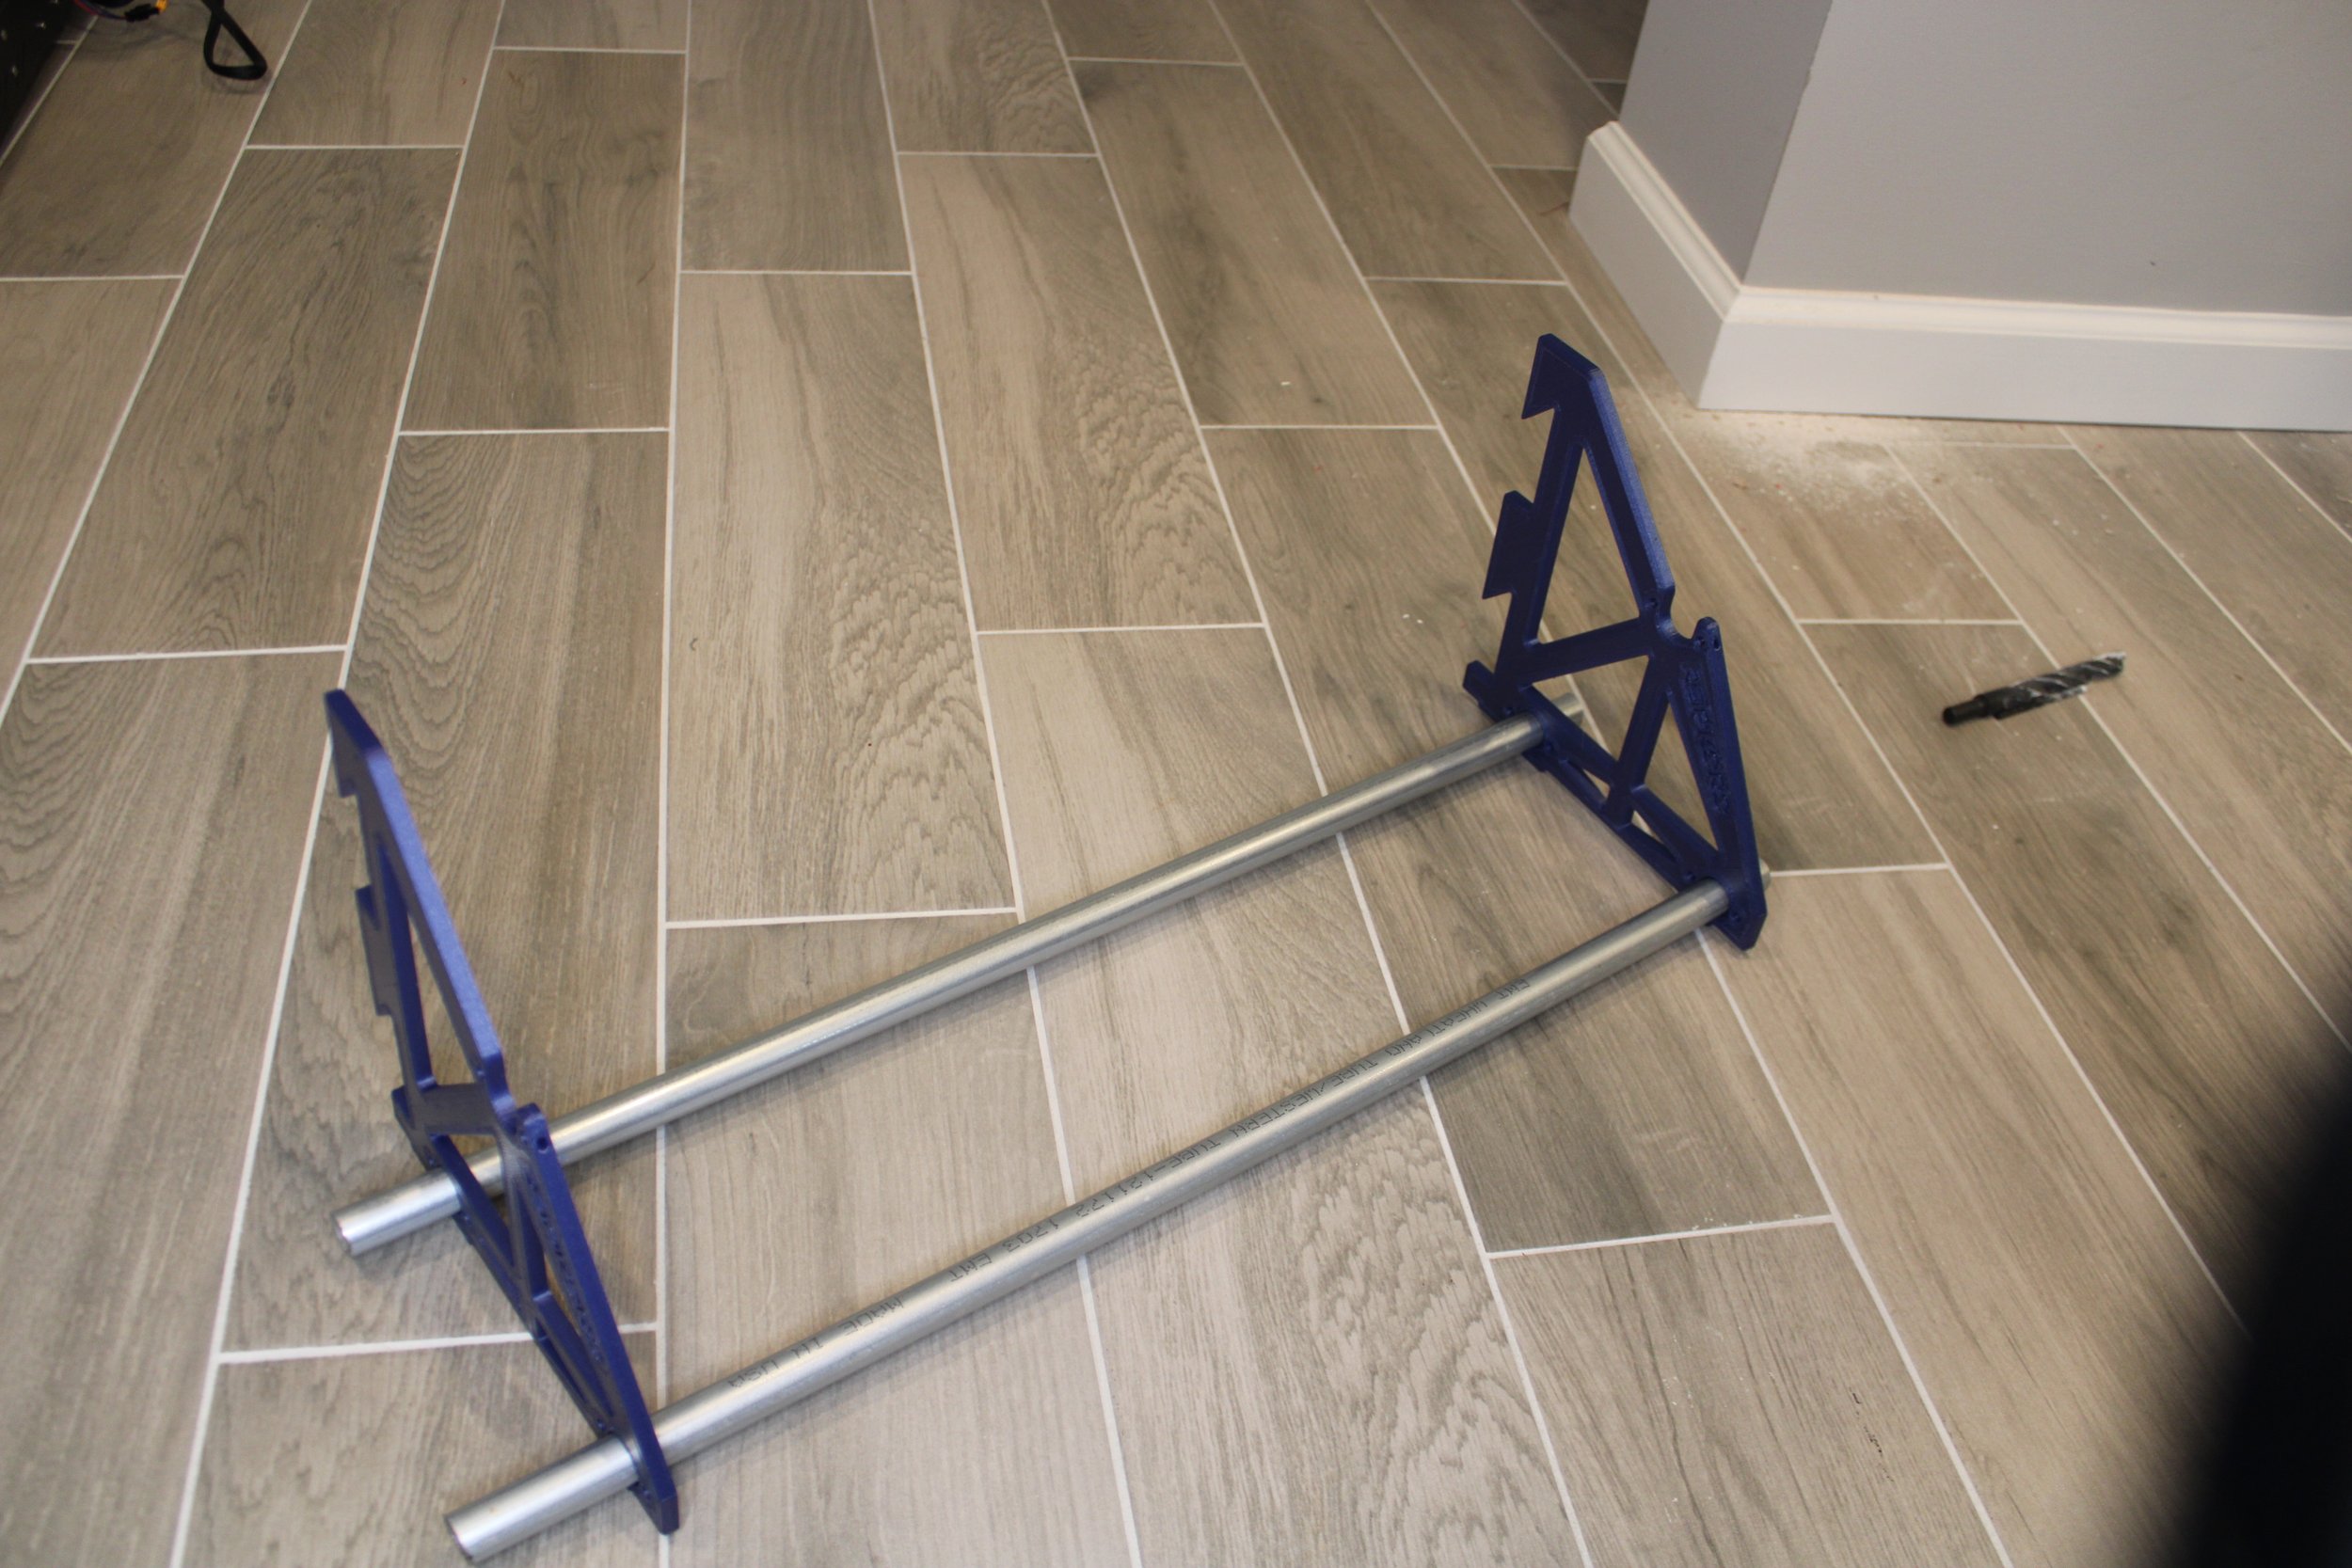
Here is the completed unit - Cleat and Hanger - that I used to hang my filament. You’ll notice the absence of the Rod Clamp that I chose not to use.
DOWNLOAD THE PARTS NOW
The Process
--
The Process --
1.) I started by placing the cleat onto the wall and then the hanger within it. Because the hanger sits lower than the cleat (which means the filament will also sit lower) I wanted to find a good height based off of the hanger and not off the cleat.
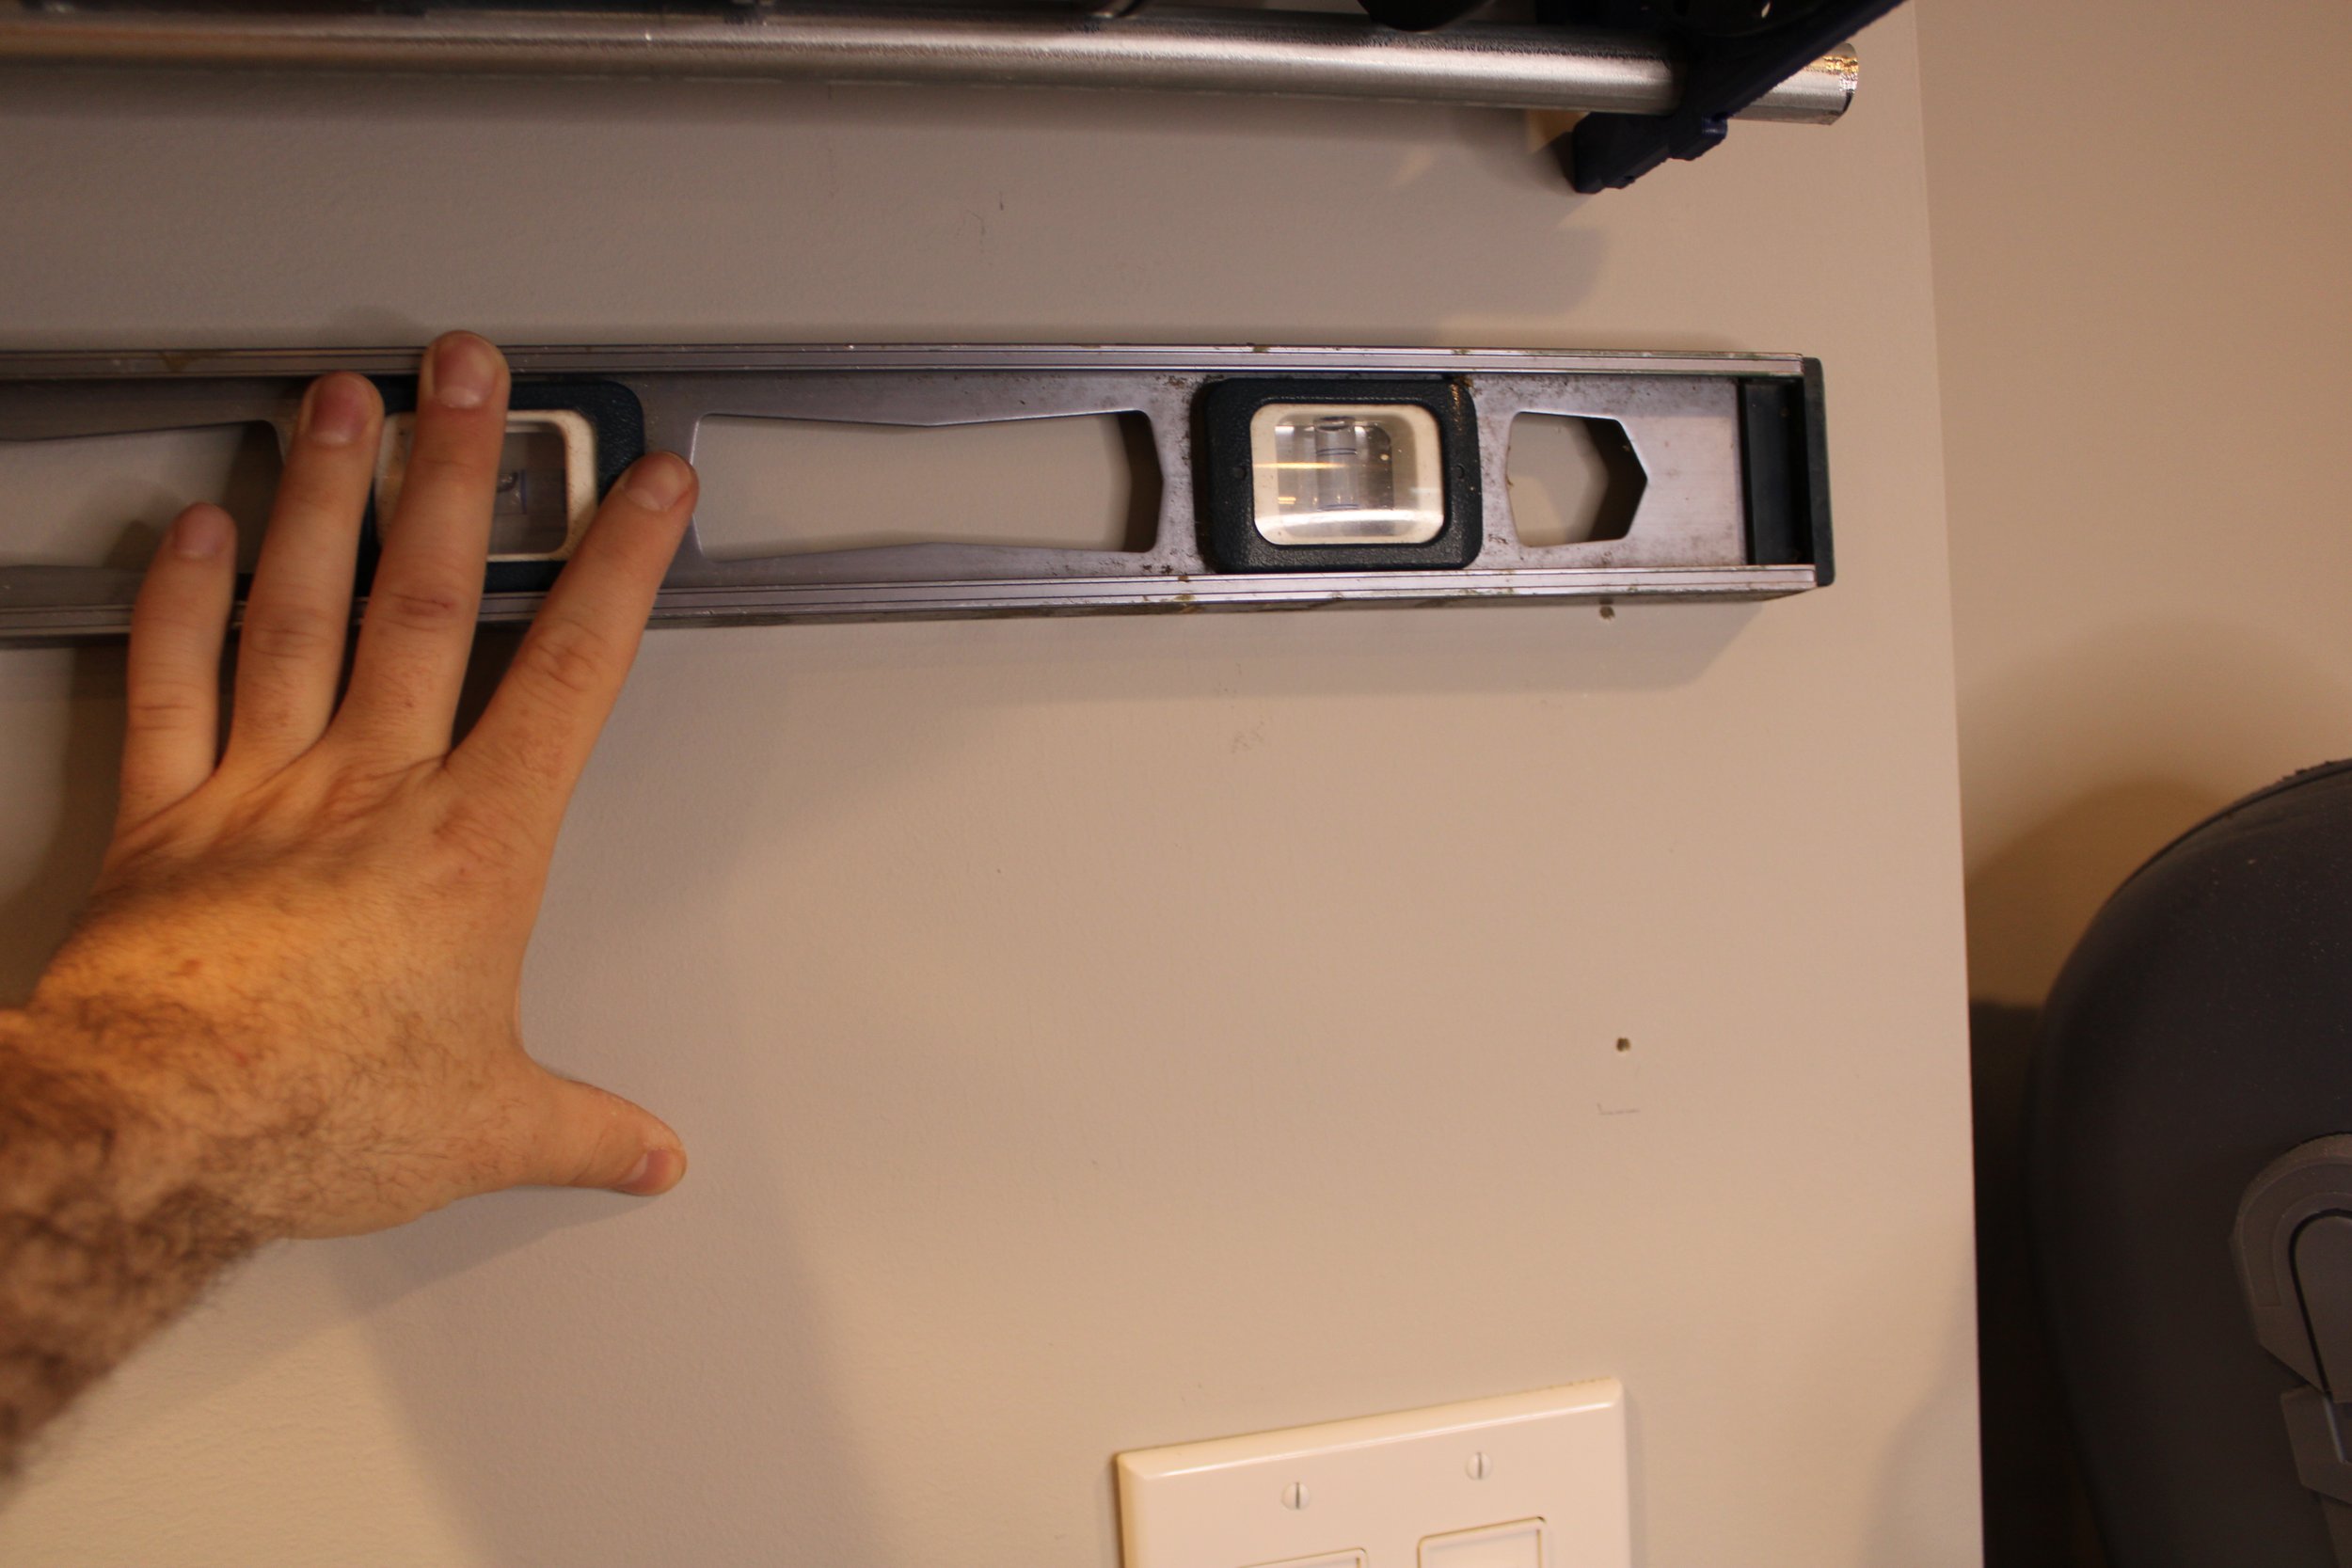
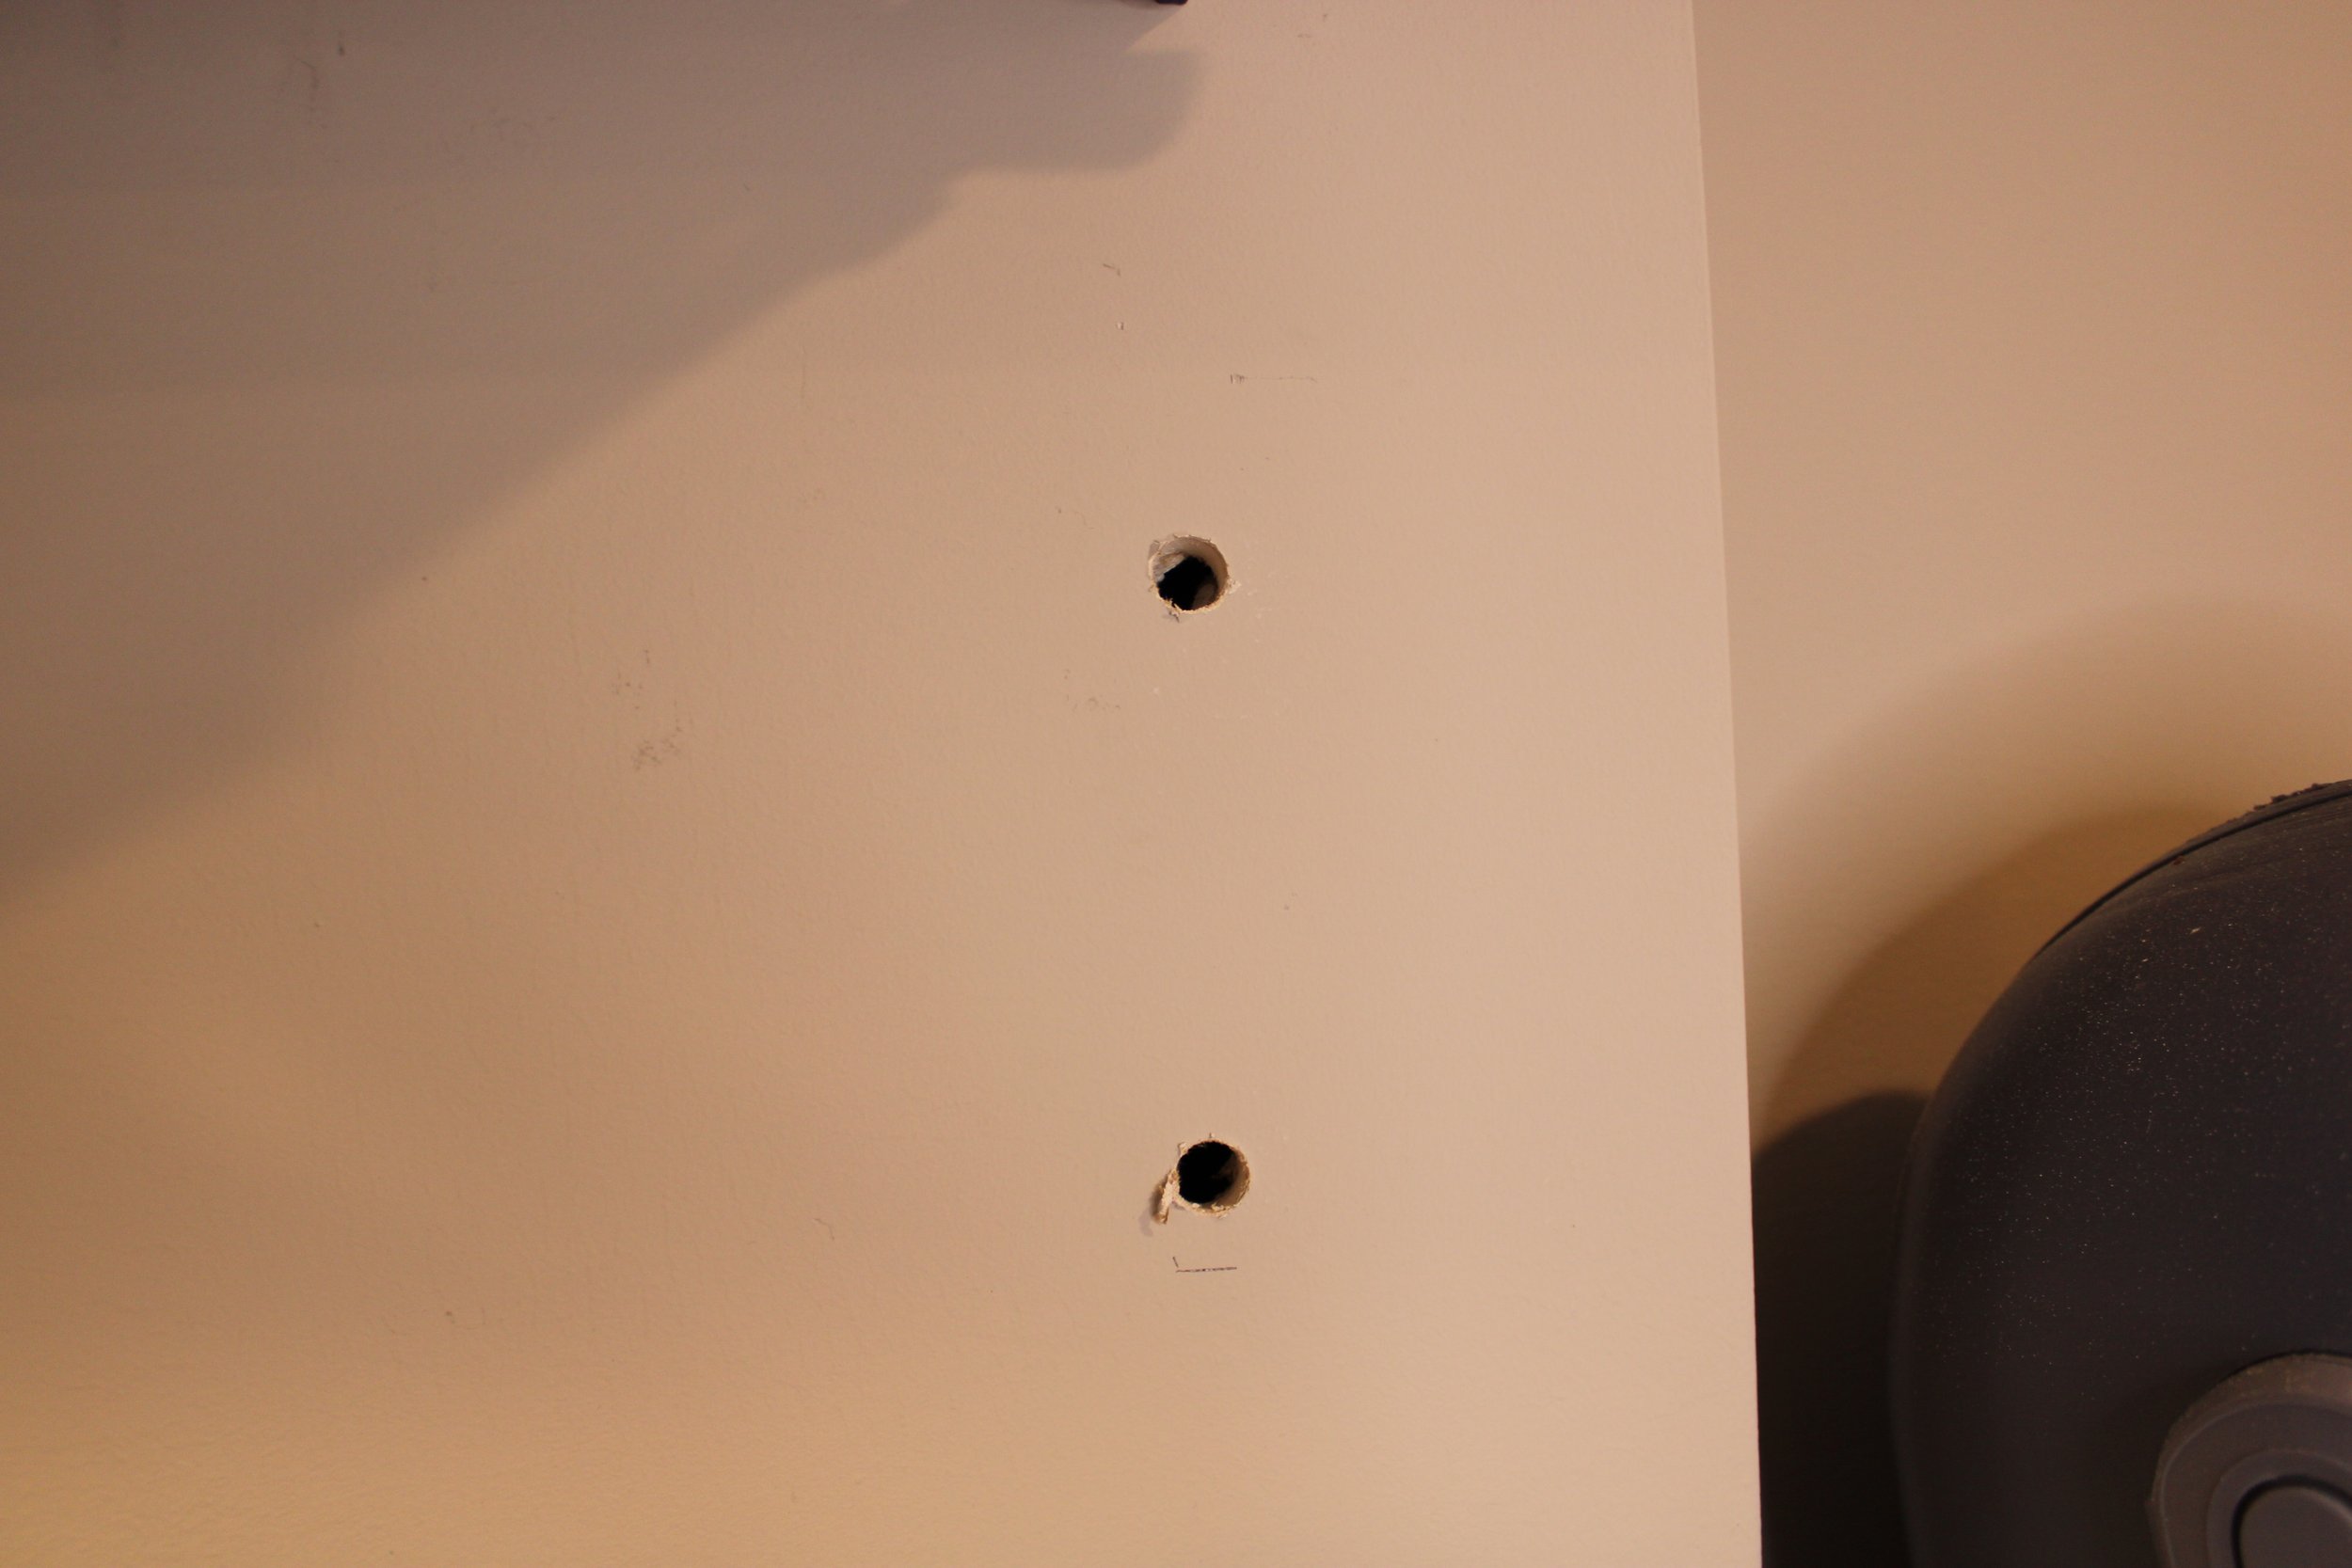
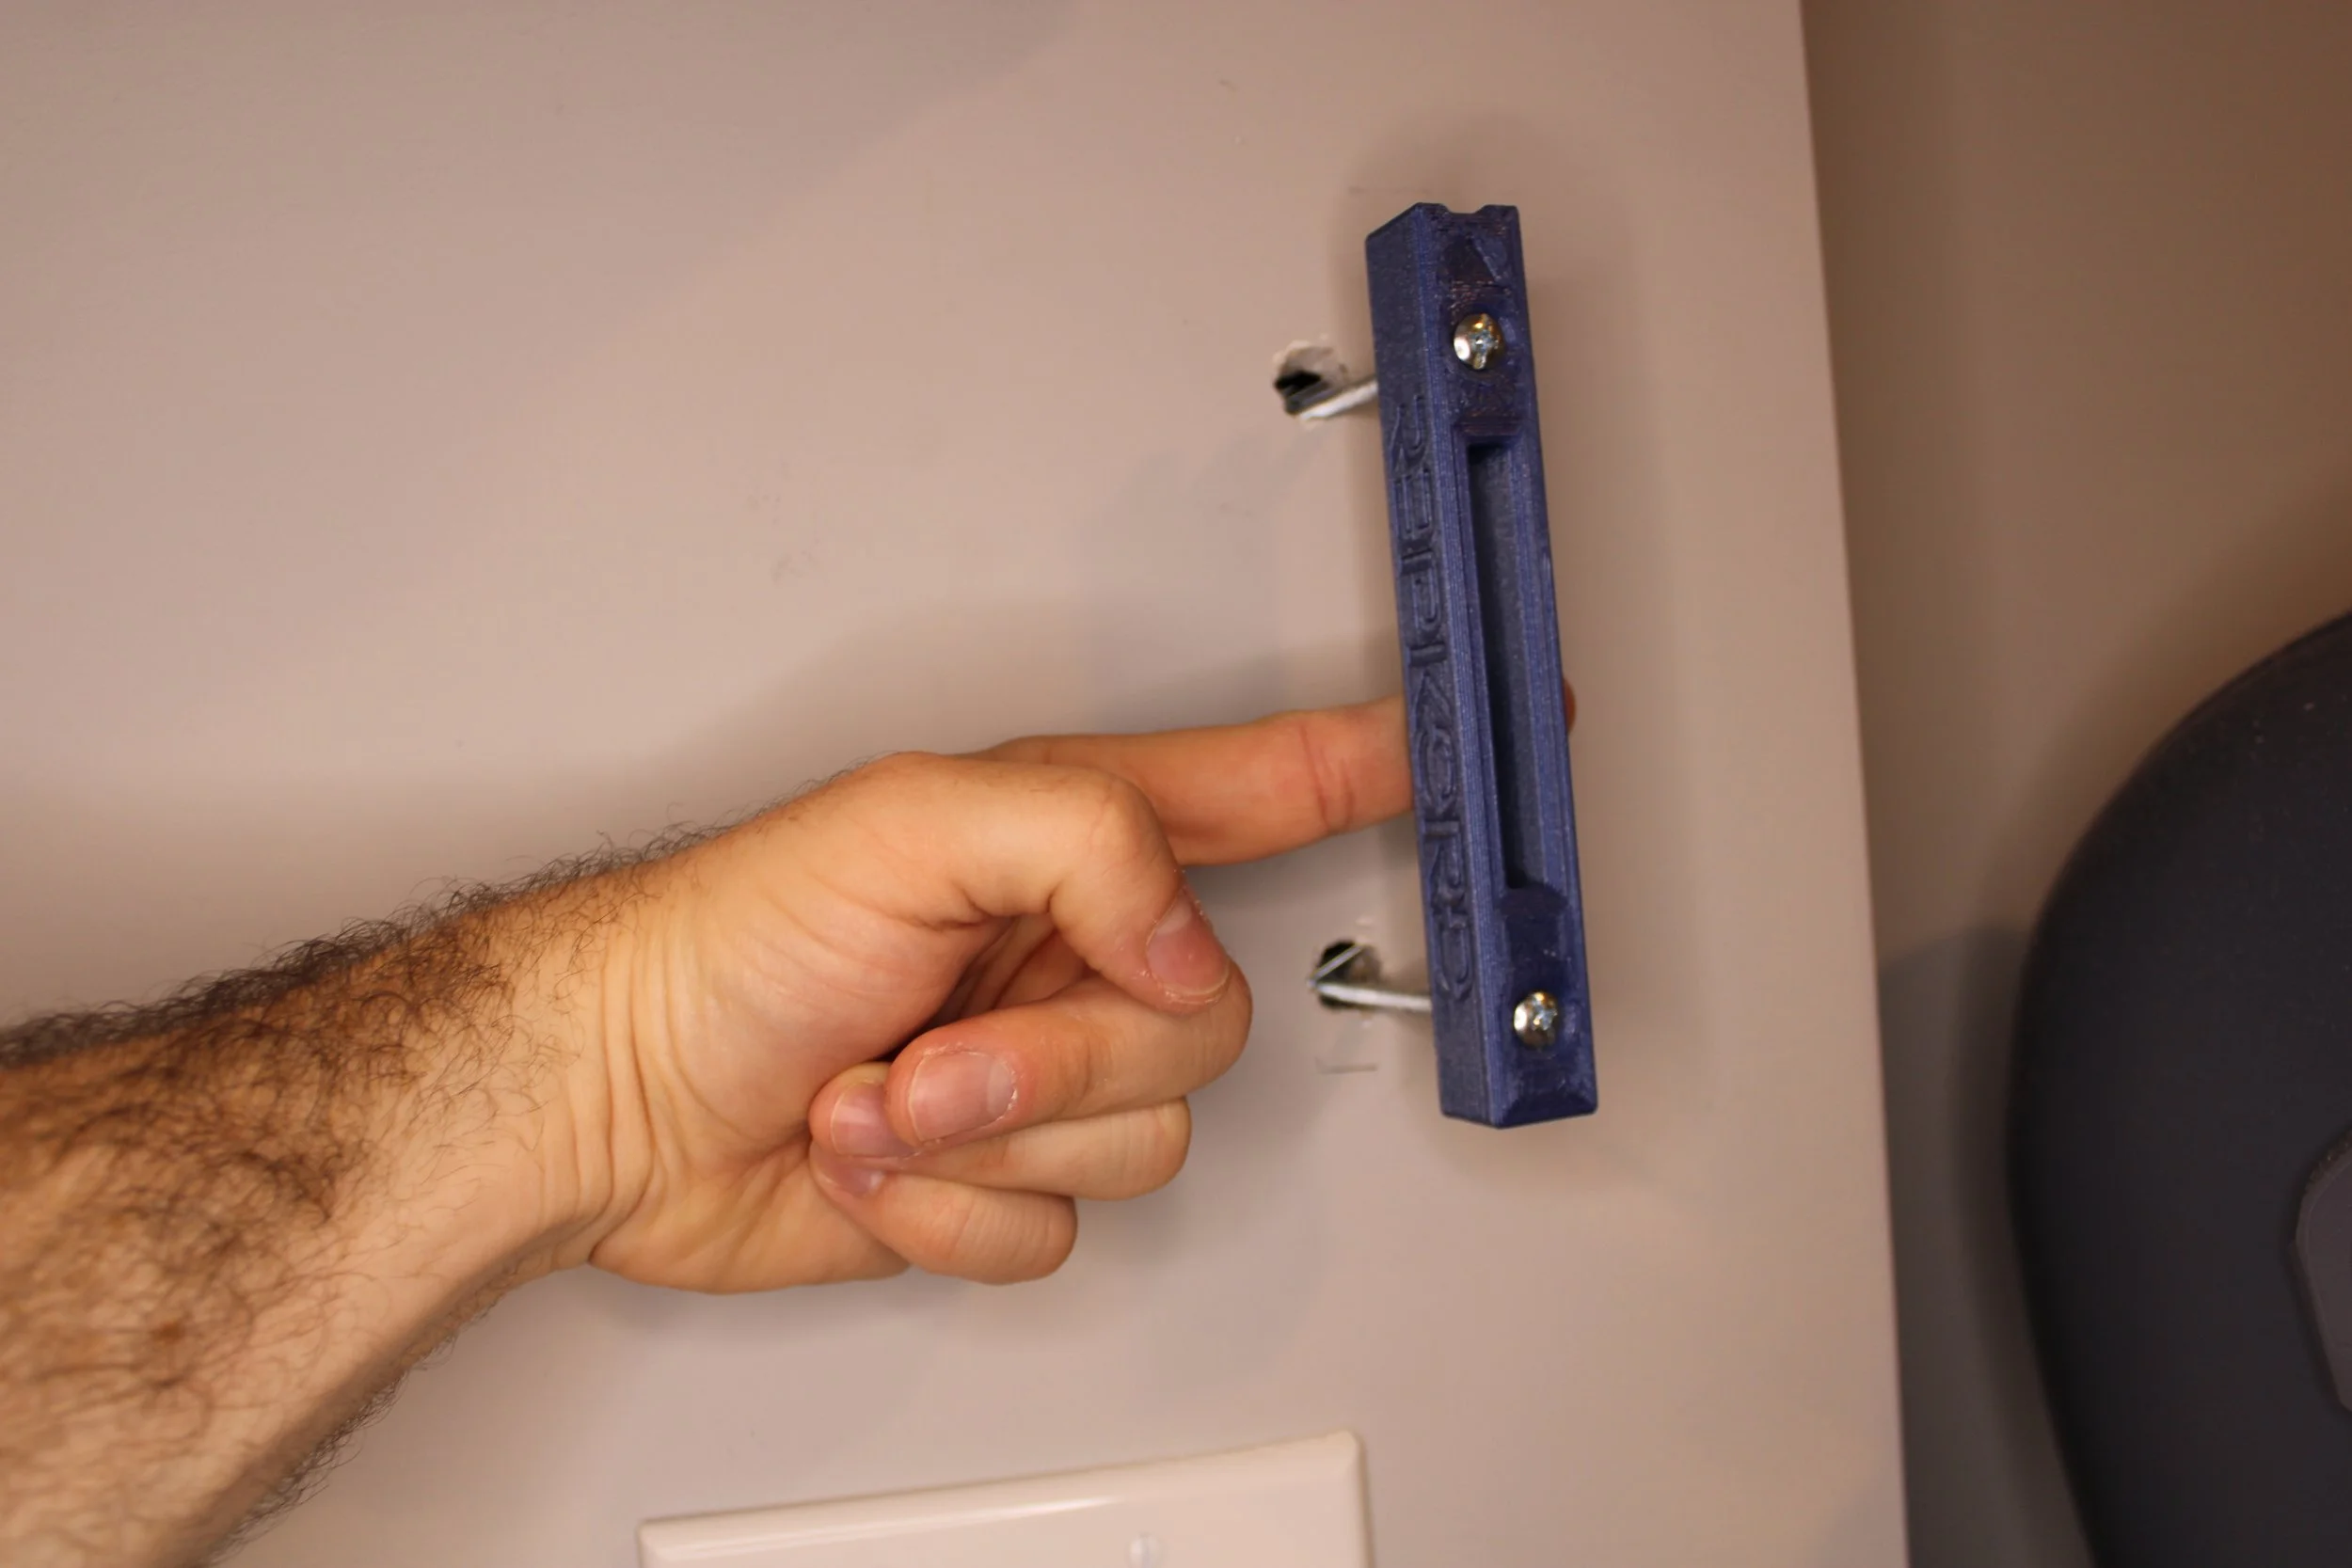
2.) When I was satisfied with the height (I had enough room to remove filament from the shelf without bumping into the ceiling or any surrounding objects) I used my level to make sure it was sitting properly. Then using a ⅛” drill bit and power drill I made two pilot holes in the wall, one in each screw insert of the cleat (top and bottom).
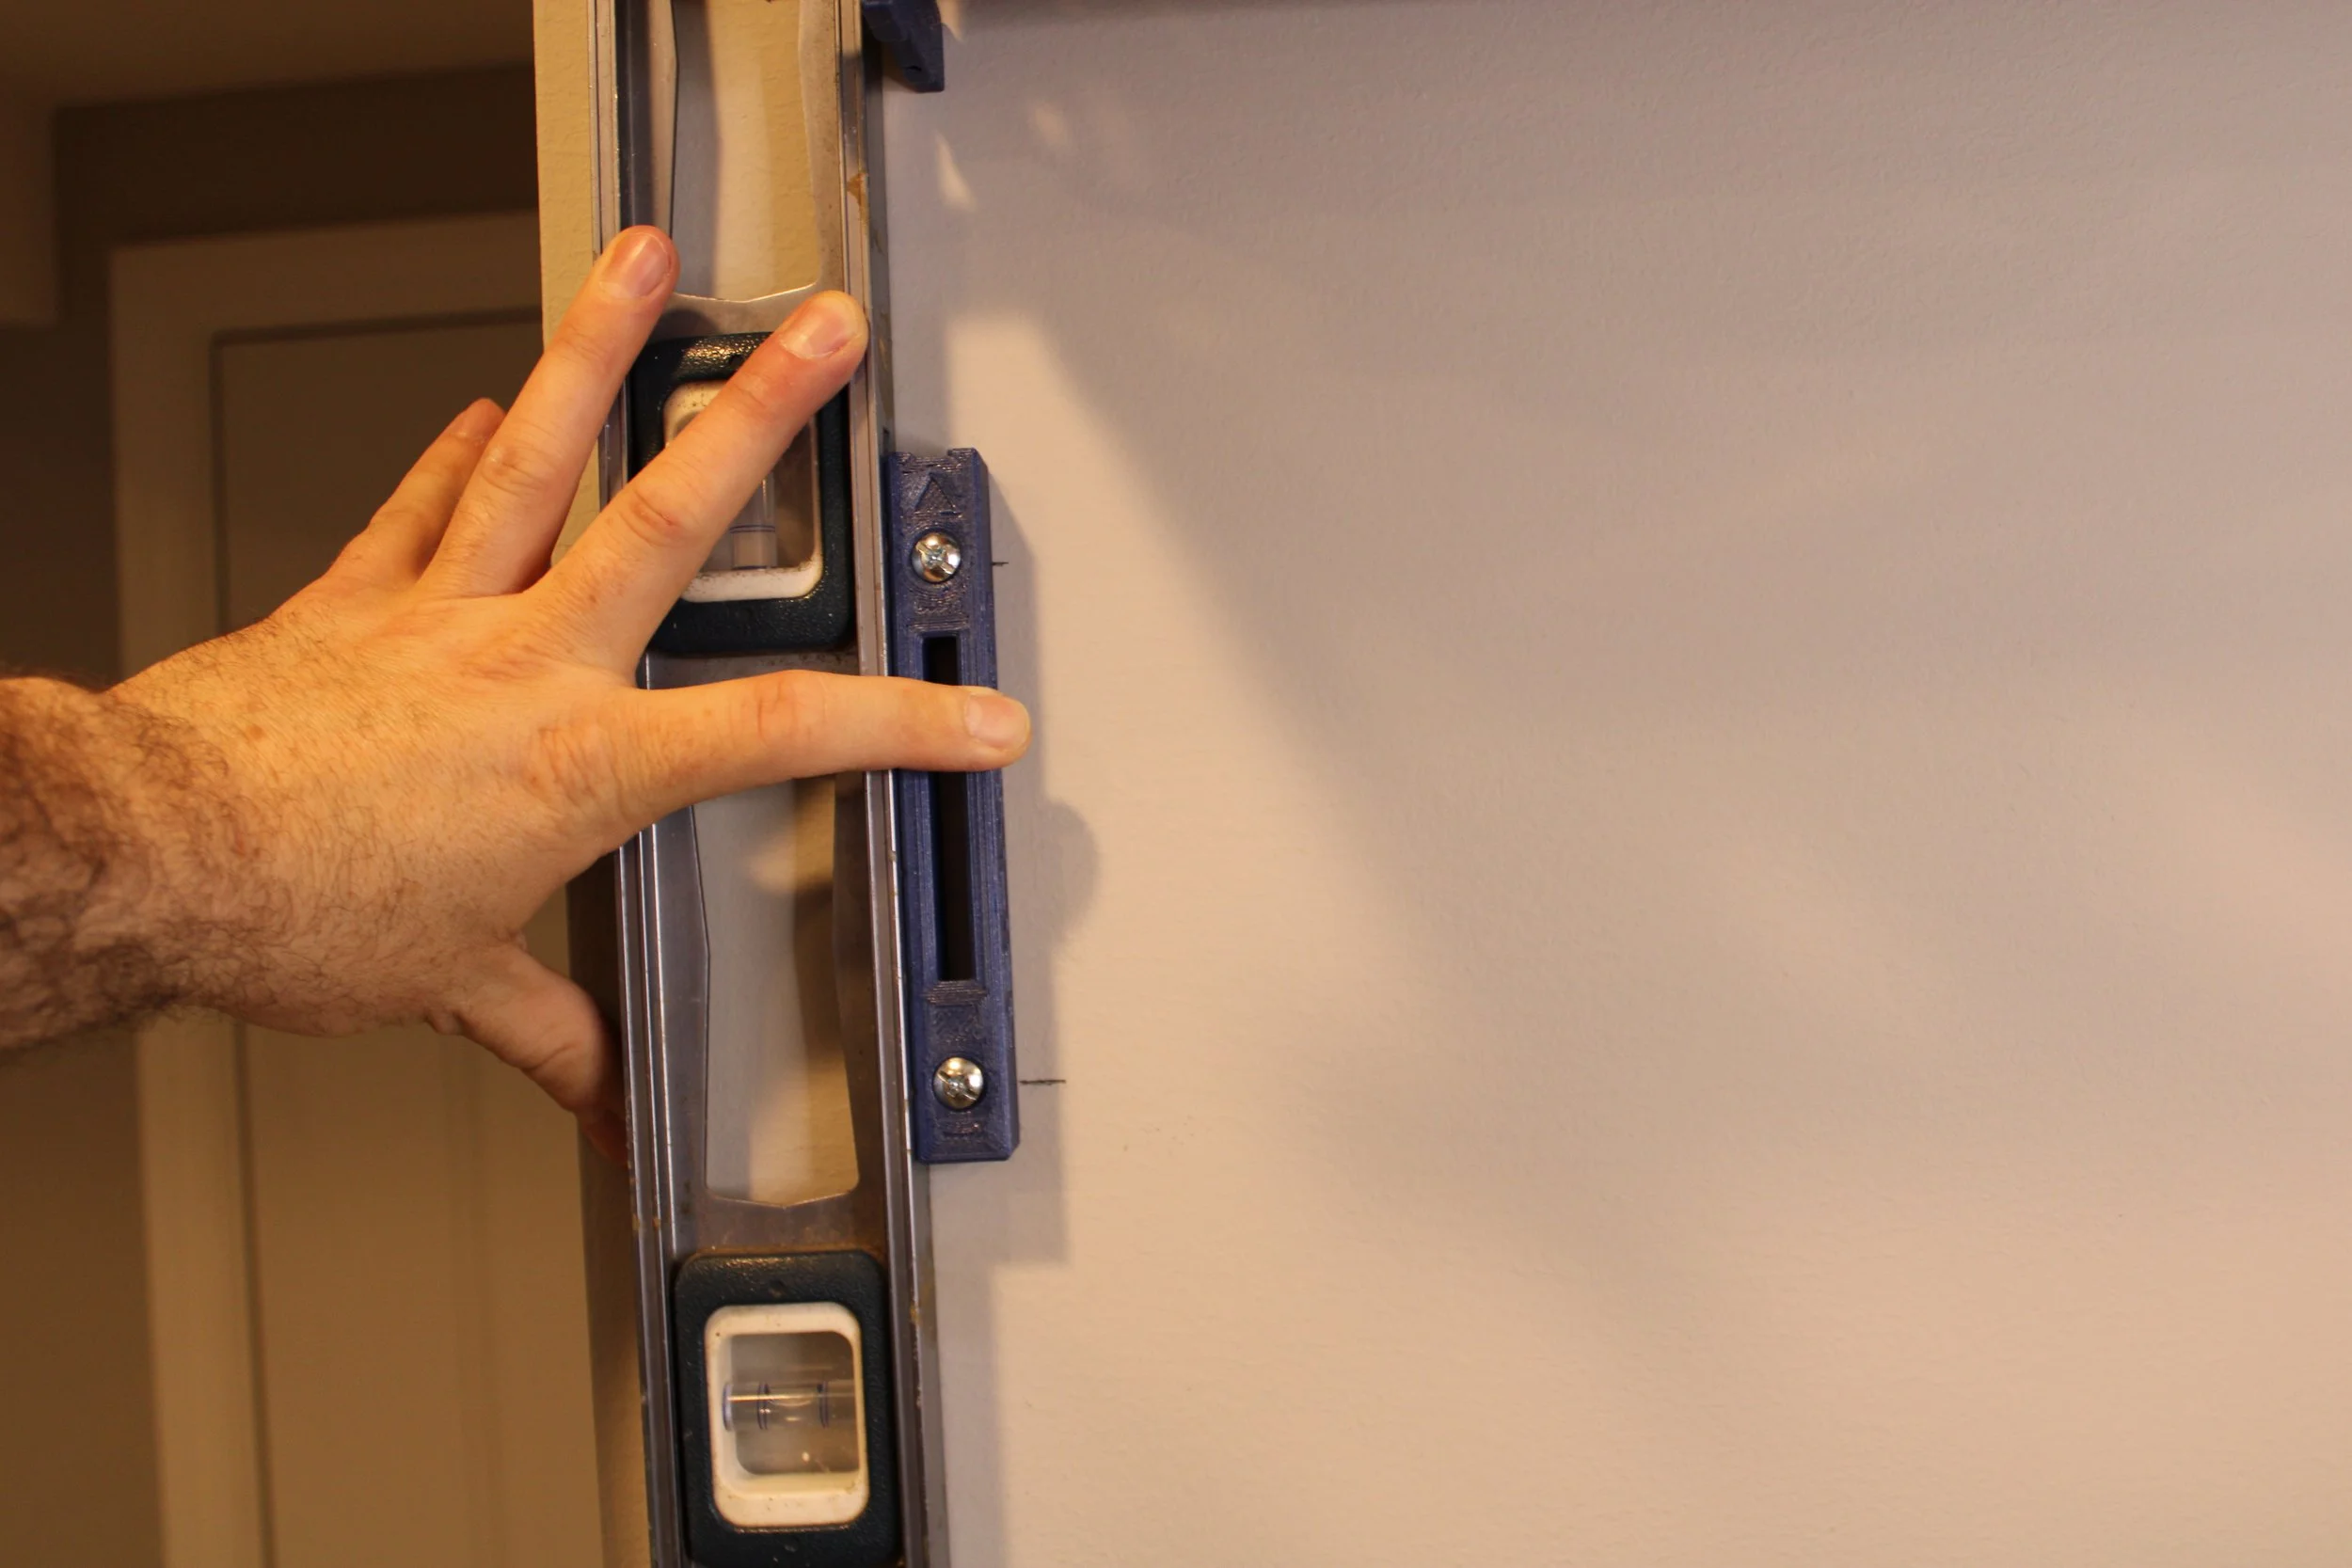
3.) After making the pilot holes, I used the level to make a corresponding set of marks on the far side of the wall. I lined up the level with the pilot hole then across the wall to the other side. Once it was level I made a mark where I wanted my cleat to be.
Again, because this is hollow drywall without any studs, the length between the hangers is completely up to me and how much weight I think should be supported by this number of hangers. Because the wall I chose is so narrow I didn’t have a lot of options, but if you are choosing to use these hangers on a hollow drywall section of wall that is longer than 2ft (perhaps 6-8ft)you’ll want to spread out these hangers according to how much weight you think each section can comfortably hold. In my case I chose 2 hangers for this 2 foot section of Rack.
4.) After making these new marks I once again placed the cleat on the wall (lined up with the marks), made sure to use my level, then used the ⅛” drill bit to make two more holes.
5.) After that I measure the size of my toggle traps and found a drill bit that most accurately measured up to it, in my case it was a ½” drill bit. I then used this larger drill bit to open, or expand, the pilot holes so I could fit the toggle traps through the wall.
**Something major to keep in mind if using these toggle bolts is the amount of ‘play’ or ‘space’ you are going to have. Because the ‘trap’ section of the toggle bolt is significantly larger than the bolt the hole will be much bigger than the bolt, and thus the bolt will be able to float around inside the pilot hole. It’s at this time, when mounting the actual cleat to the wall, that your level will be most useful. You’ll need to use your level while tightening these cleats down, because at this point you can make any fine adjustments to make sure the shelf is going to be properly leveled**
6.) Make sure before inserting the bolts into the wall you have run them through the wall cleat. The bolts need to be entirely assembled before you mount them onto the wall. Otherwise you’ll have to remove them and start over.
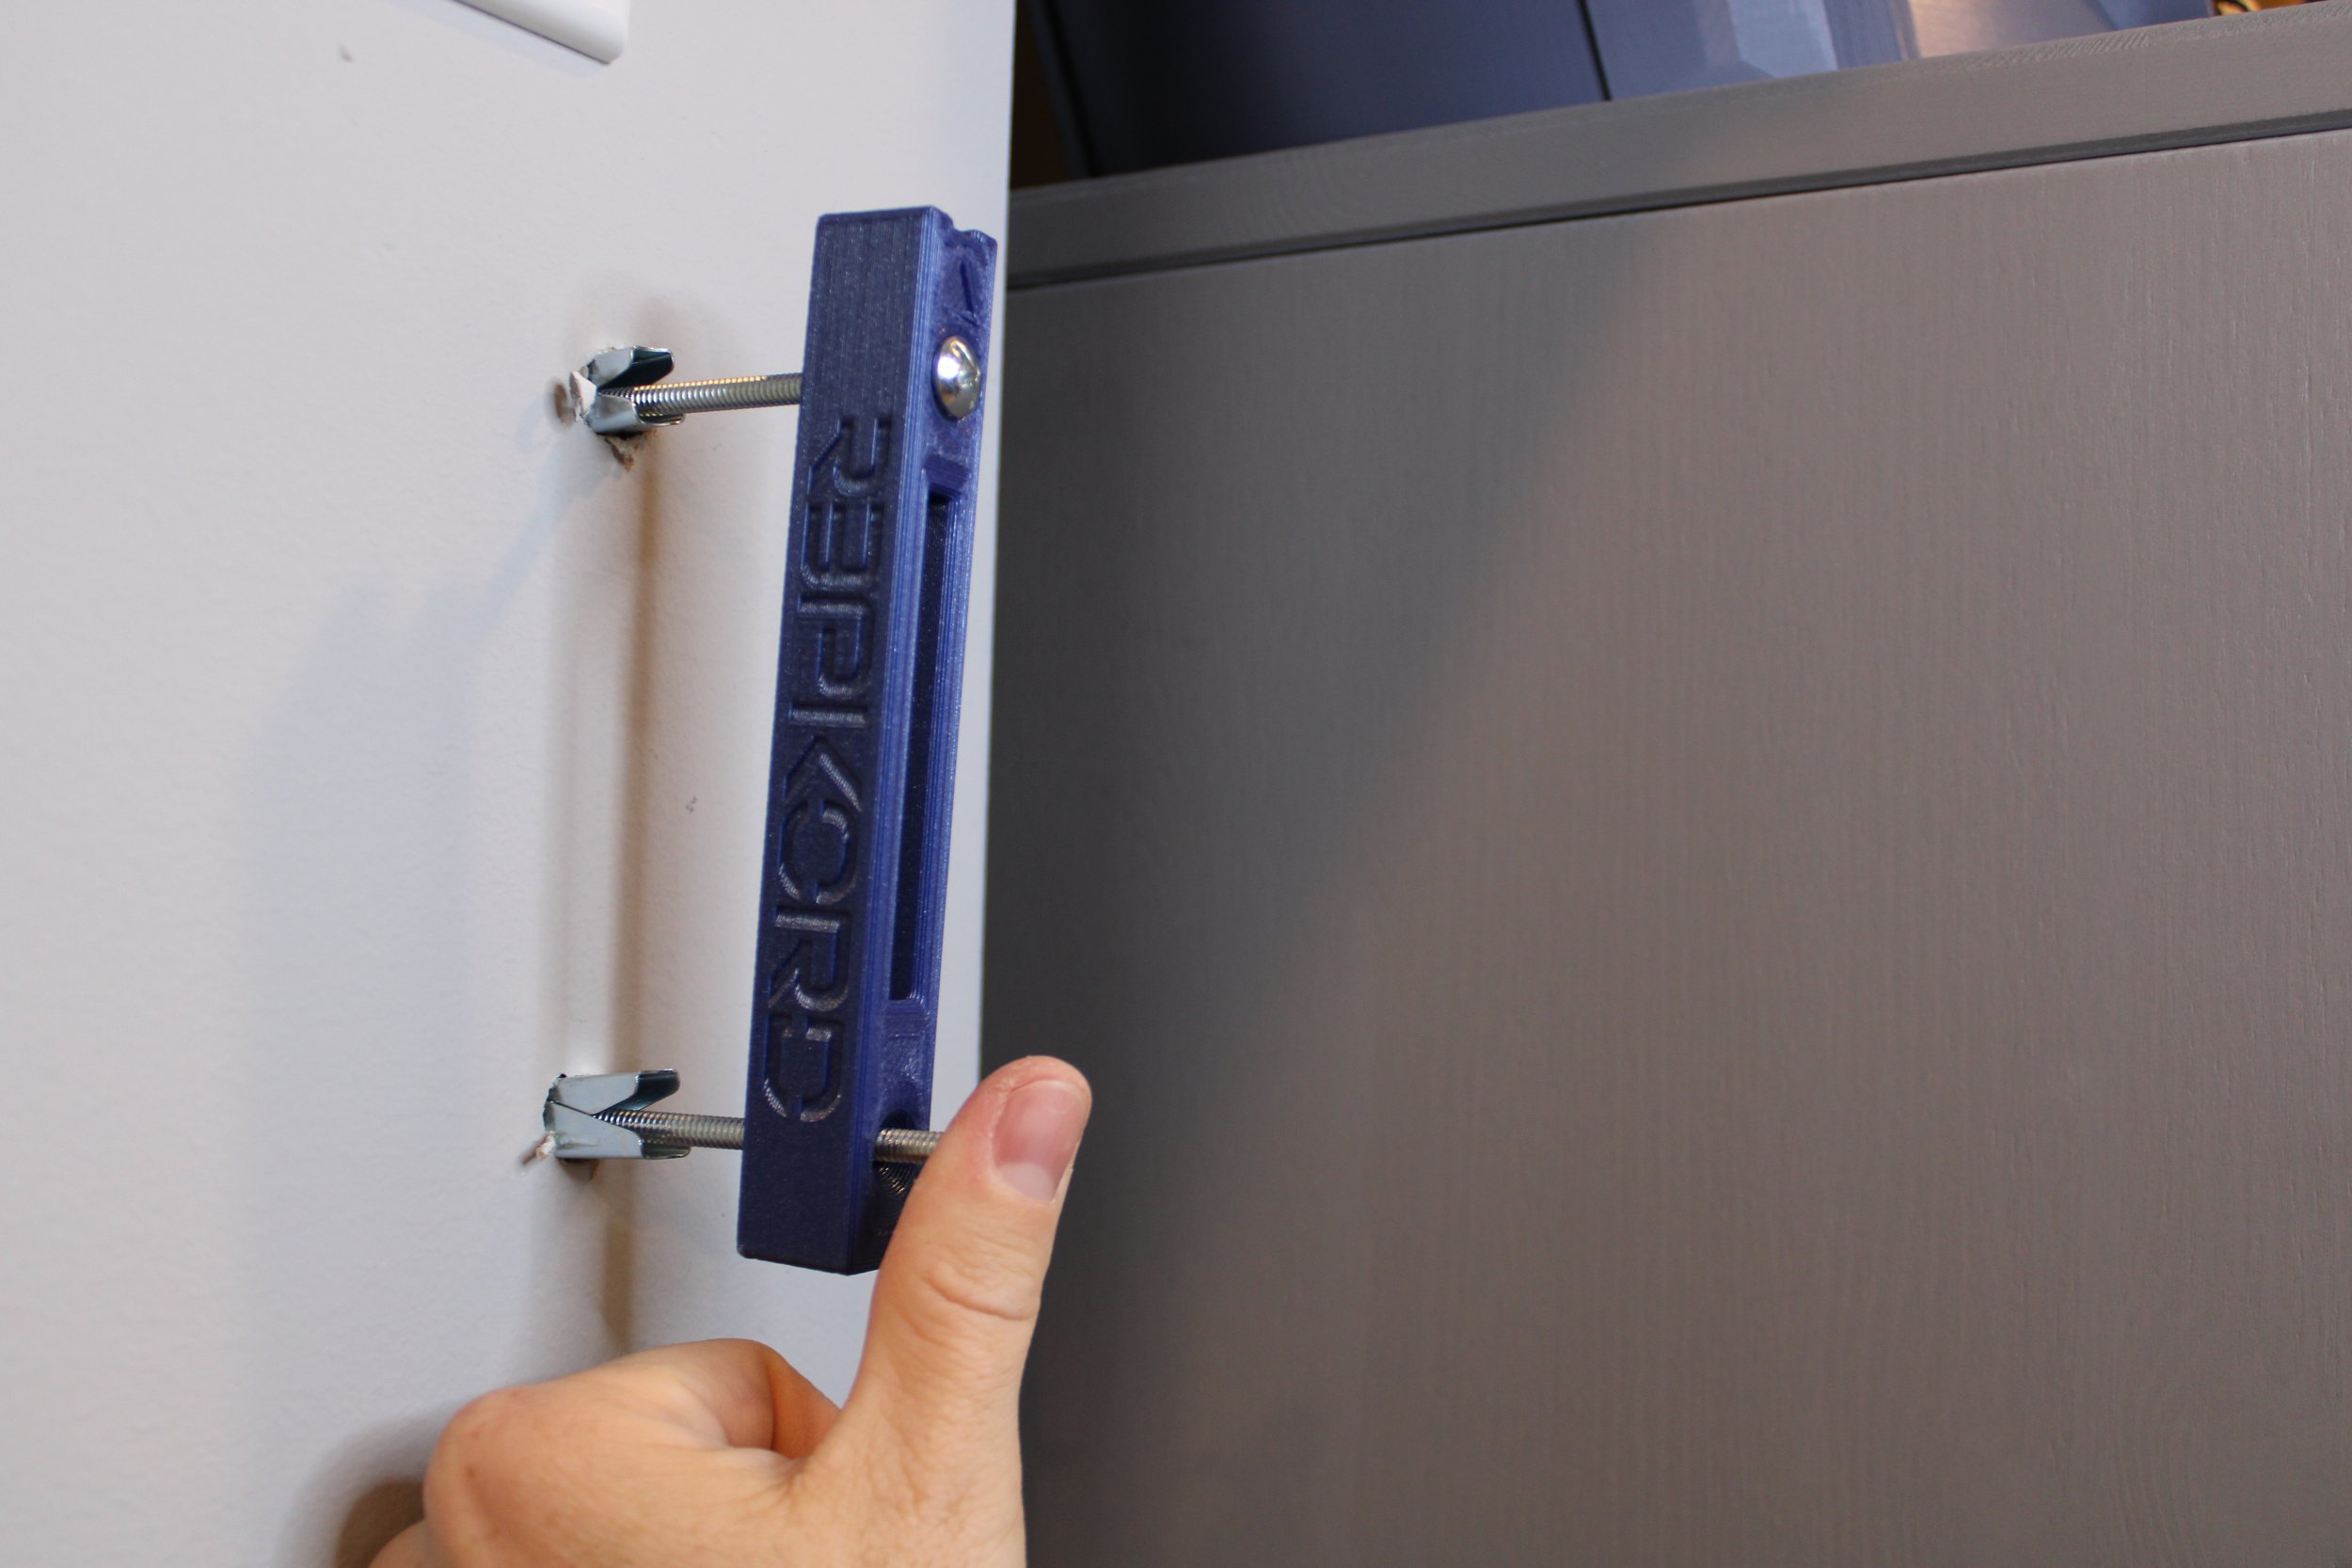
7.) Even with a large drill bit I was unable to make holes big enough to simply ‘pass’ the toggle section through the wall, which is fine as we don’t want to make too large of a hole. So I had to use a little bit of force to press the toggle sections through the wall to the other side. I found the best way to do this was by only threading the toggle portion onto the bolt slightly, so you have a large section of bolt exposed, and then pass one bolt through at a time, while the opposite bolt is retracted into the cleat so it isn’t scraping against the wall and marking it up as you do this. Make sure the Arrow on the cleat is facing up
8.) Once both toggles have been passed through the wall you’ll want to make sure they have been activated. Pull the bolt away from the wall and inspect if the toggle has opened and is holding onto the wall. It’s perfectly normal for one section to have opened and the other to remain closed; when this happens you can simply drag the unopened portion against the inside lip of the wall and force it to open up.
9.) After both sections of the toggle bolt are opened you can begin tightening it down. There needs to be pressure against the toggle in order for the bolt to tighten, or while spinning the bolt the toggle also spins and does not tighten. Apply slight outward pressure on the cleat, this pulls the toggle against the wall, and begin to tighten down each bolt. BE VERY CAREFUL if your hand is behind the cleat as you can over tighten this too quickly and your hand will be squished between the cleat and the wall.
10.) Get the cleat firm but not completely tightened down, it’s at this point there will be some play in the cleat and we can properly level it using a level. Use the level to make sure both the horizontal and vertical planes are correct and then tighten the bolts down. Tighten them down completely and make sure you can pull on them firmly and they do not budge from the wall.
11.) Do the same thing for the mirrored cleat. This time use the bottom of the previous cleat to level the horizontal plane and then the side profile for the vertical plane. Tighten this cleat down and make sure it is secure.
12.) That’s really the bulk of the work. After, you can slide in your 3d printed wall hangers to see how low they are sitting.
13.) The final step in this process is to thread through the bottom rod that the filament will rest on. Before you do you’ll have to measure the distance these rods will run. It’s important to take your measurements from the wall cleats and not the hangers, as the hangers can sway side to side and give you an inaccurate measurement. I measured approximately 22” from cleat to cleat, but because I wanted the pipe to extend past the hanger slightly, I ended up using 24” as my final measurement.
14.) I purchased a piece of 10ft ½” emt pipe from my local Home Depot, it’s possible your local hardware store can cut your pipe into lengths that you provide - that makes this whole process so much easier- that was not the case for me. Luckily I had access to a band saw and after a few minutes I had 2 lengths of 24” pipe. Whenever using power tools, especially those meant to cut, take all necessary precautions.
15.) The next step is to slide the pipe through each hanger, and you’ll want to do this while the hangers are off the wall. The tolerances for the inlet and outlet holes are tight and you will probably have to use a little force to make sure the pipe passes through the hanger. This is better done when you can stabilize the hanger in your hands, or else you risk snapping the hooks that hold the hanger onto the cleat. Once the rods are through it’s time to mount the full unit and marvel at your handiwork. Congratulations, you're finished!
As an Amazon Associate, I earn a small commission from links shared on this site, at no cost to you.


