This page contains the Equipment Upgrades and Calibrations I recommend for the Voxelab Aquila series of printers. Including the Aquila, Aquila X2, Aquila S2, and Aquila C2.
The Voxelab Aquila is a great entry-level printer because it offers high quality prints at a very low cost. Out of the box there are certain upgrades that are needed, some that are recommended, and even more that might caterer to the specific needs of the user. Read through the list, see which ones are necessary and which ones are cautionary. At the top is a quick guide if you don’t want to read the HOW and WHY of each upgrade, you can click a link and just buy it.
The bottom of the page has a Calbiration guide, and it is strongly recommended that you go through each of those calibrations to make sure you printer is able to print optimally.

As an Amazon Associate, I earn a small commission from links shared on this site, at no cost to you.
Upgrade Overview
Immediate Upgrades:
Cold end extruder - BMG Dual gear extruder clone : https://amzn.to/3f7K8vQ official : https://amzn.to/3MXZZd7
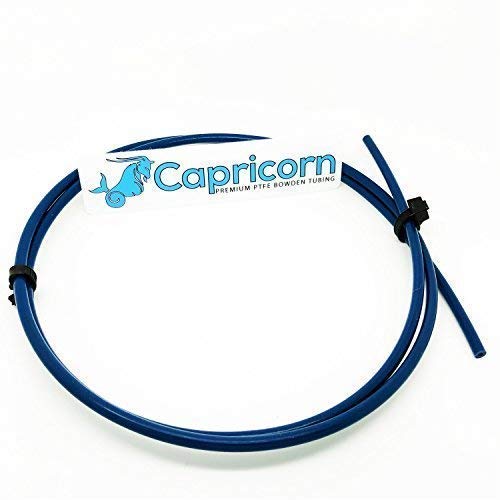
Bowden tube - Capricorn Bowden Tubing : https://amzn.to/3W0MwoP
Bed springs - Yellow Stiff Bed Springs : https://amzn.to/3SwIUrT
Moderate upgrades:
Firmware upgrade - Alex’s Firmware
All metal hot end/bi metal heatbreak - Gulf Coast Robotics All Metal Hot end : https://amzn.to/3gEkPCh
Quality of life upgrades:
PEI bed sheet - Hictop textured PEI bed sheet and bed magnet : https://amzn.to/3TOP0ER
AutoBedLevel probe - BL Touch official : https://amzn.to/3VXGfdB clone : https://amzn.to/3slxZ9T
Calipers - digital : https://amzn.to/3gwllC5
Nozzles (assortment) - MK8 : https://amzn.to/3gEmuaY
Fans(noise) - parts cooling fan 24v : https://amzn.to/3CXjNsq hot end/mainboard fan 24v : https://amzn.to/3TuQncn
Immediate Upgrades
Cold end extruder

The cold end extruder (along with the extruder stepper motor) drives filament forward towards your nozzle. The stock extruder on the Voxelab Aquila is made of cheap/weak plastic. Over time the extruder will adopt hairline cracks that are not visible to the naked eye. These cracks weaken the extruder causing it to lose tension and not be able to push out the correct amount of filament. There are 3 main upgrades you can choose from:

This is the stock extruder for the Voxelab Aquila. When this fails it is often not obvious and leads to degrading print quality that will have you scratching your head. Replace it before you fall down the rabbit hole.
Dual Gear BMG clone - This extruder is not only a replacement but a strict upgrade. This offers dual geared movement(opposed to the stock single gear) which offers more accurate extrusion. The enclosed nature of this extruder also allows the ability to easily(nothing in 3d printing is easy lol) print with flexible filaments like TPU. The original model is the BONDTECH BMG. It’s an expensive option but this is the company that is doing the work to make the advancements in technology. The various BMG ‘clones’ are great. They are cheaper and copy the original in almost every aspect. The quality of these is not as high as the original but more often than not you will receive a fine product. Out of the options I discuss, this is the choice I recommend!
Difficulty: 1-5 = 3 fairly simple removal and install. New e-steps(see calibrations) will have to be calculated afterwards and they will be higher than normal - around 400-420.

This is a clear BMG clone style extruder. It is enclosed and made of injection molded plastic.

Dual Gear All Metal - Just like the BMG clone this extruder offers dual geared movement. That means this is an upgrade as well as a replacement. The issue with this extruder is the second gear that sits inside the tension arm. If there is not a spacer on that gear then it will eventually grind into the arm throwing metal filings in the process. If you cannot confirm the gear has a spacer with it then DO NOT BUY this extruder. I have linked extruders that do include the spacer, but double check before buying as sometimes companies are known to change the products in their listings. I was able to print flexible filaments, like TPU, with this extruder.
Difficulty: 1-5 = 3 fairly simple removal and install. New e-steps(see calibrations) will have to be calculated afterwards and they will be higher than normal - around 130-150.

All metal dual gear extruder. The linked product shows the necessary bushing within the tension arm to keep the extruder from grinding itself away.

SIngle Gear All Metal - This style of extruder is an exact copy of the stock extruder only it’s been cast in metal, so it will not crack and lose tension. This is a fine replacement for the stock extruder, however it’s not an upgrade, as it still uses a single gear.
Difficulty: 1-5 = 3 fairly simple removal and install. New e-steps(see calibrations) will have to be calculated afterwards and they should be around the normal range - 93 - 98.

Shown here is a red all metal single geared extruder. These can also often be found in sliver.

Here’s my video that goes over a few of these options and the removal and installation process.
Bowden Tube (PTFE tube)
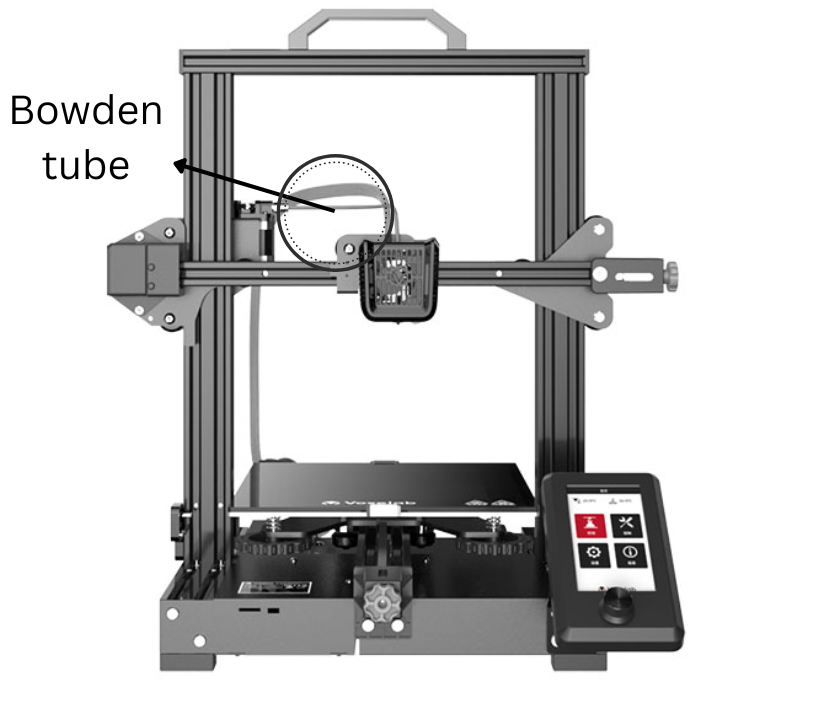
Referred to by two names - bowden tube(mechanical name) and PTFE tube(material name - PolyTetraFluoroEthylene), this is the tube that directs and constricts the filament path between the cold end extruder and the hot end. On some models the bowden tube reaches all the way down to the nozzle (the list includes but is not limited to - Aquila, Ender 3, Ender 5, Eryone ER20, Jayo S8). The bowden tube is made up of teflon and if it reaches high temperatures (~240c and above) it can off-gas harmful toxins. If you want to print higher temperature materials this a must replace for any printer where the tube is touching the nozzle. The stock tube has a larger diameter path and is of unknown origin, a direct upgrade is a Capricorn Bowden tube. This tube has a narrower filament path, allows the filament to be fed easily, and can withstand higher printing temperatures (up to 260c). This is a slam dunk upgrade as this is the best company and the installation is simple.
Difficulty: 1-5 = 1.5 simple removal and install. You may need to heat the hot end to get your stock bowden tube removed.

The red arrows are pointing out the blue capricorn bowden tube that extends from the cold end extruder to the hot end.
Bed Springs (yellow)

If you don’t know this already the end all be all of printer calibrations is leveling your print bed. The items that keep your bed level are the springs. Stock bed springs offer moderate tension and can distort over time, meaning you’ll be re-leveling your bed more often than you’d want. Upgraded bed springs, usually yellow in color, off a stiffer spring which should keep your bed at a more consistent level over a longer period of time = leveling your bed less.
Difficulty: 1-5 = 2 replacement is not hard but care should be taken while doing so. Releasing any one adjustment knob fully can warp your bed, so take your time and slowly loosen each knob until you can remove the, and replace the springs. I go over the loosening procedure in my BED LEVELING video (see Calibrations).

Stock photo above as a place holder

Moderate Upgrades
Firmware

stock firmware is capable, but upgrading adds features and reliability that isn’t offered out of the box. Alex’s firmware is the go to upgrade for these printers, but it has variation that depends on the chip your mainboard has. Make sure you know whether you have a STM32, G32, N32, or H32 chip before embarking. This firmware has support for bed leveling devices or gives you the option to get the benefits of a bed leveling device manually(manual mesh leveling).
The Aquila C2 firmware cannot be updated in the same way as the rest, so do not follow this guide.
KLIPPER - this firmware is printer agnostic, and thus, can be added to any 3d printer. It might be too far out of the scope of someone new to 3d printing, but knowing it exists is a good thing. It offers faster printing speeds, wireless printing, and the ability to control your printer from a webpage(also the addition of a camera). It requires additional equipment (raspberry pi or similar) and a little know-how. If you’re interested in seeing some of the process I have a video that details Getting Klipper on the Voxelab Aquila, as well as a TEXT GUIDE.
Difficulty: 1-5 = 4.5 The high difficulty score shouldn’t scare you away, it’s just with a modification like this that is mostly on the digital side (copying files, renaming files, loading to an SD card), there’s a lot of areas where an error could occur. Ranging from making a simple file naming mistake, to having an incompatible SD card. What’s harder is tracking down and fixing that error. If you’re interested in a firmware upgrade for the Aquila I go over the process in the second half of my BL Touch installation video HERE, as well as a written guide that can be FOUND HERE.
I go over the firmware install process in the latter half of this video
All Metal hot end/Bi-Metal heatbreak

The term all metal hot-end can be confusing, if you were to look at the hot end from the outside it appears to be all metal, and it is, but the inside is what this refers to. If the PTFE tube(bowden tube) extends into the ‘hot zone’ than the extruder is not all metal. The stock hot end on the Voxelab Aquila is an MK8 style hot end and it is not all metal. All metal extruders allow you to safely print with higher temperatures, because the PTFE tube is away from the hot zone and it will not off gas toxins(see this article). You can choose to replace the entire hot end, or swap out the middle section (known as a heatbreak) for this modification. All metal hot ends require lower retraction settings so the molten filament doesn’t rise too far into the ‘cold section’ causing a clog.
The Aquila S2 has a different (proprietary ugh) hot end and the below upgrades do not apply to it.
Difficulty: 1-5 = 3 Removing the entire hot end is slightly easier than replacing just the heatbreak but care needs to be taken to make sure none of the wires going into the hot end (thermistor or heating cartridge) are damaged. I have a video going over the removal and install of a bimetal heatbreak below.

Here is an exploded image of the stock MK8 hot end of the Voxelab Aquila

An example of a bi-metal heatbreak

In this video I go over the installation, and necessity, of a bi-metal heatbreak.
PEI flex plate bed sheet

The stock glass bed is an excellent build surface, but this PEI flex sheet offers amazing adhesion and the easiest possible removal of prints. Just about every type of filament(PLA, PETg, TPU, ABS, PC, PA) loves to adhere to PEI(PolyEtherimide) making this a very great choice for 3d printing. This product comes packed with two pieces: the first part is a flexible steel sheet that is covered with PEI, either with a shiny appearance or powder coated to look textured(both offer the same adhesive qualities). The second part is a large magnet that is meant to be stuck to your print bed. The magnet attracts the steel sheet so it can be removed and placed back on with ease. When a print is finished all you have to do is remove the PEI sheet from the magnet and ‘flex’ it, which releases the printed part. This is a quality of life upgrade and not an immediate upgrade because I believe Glass might be the best build plate for someone new to 3d printing. Glass should be more ‘flat’ and be easier to get level than any other material. If you have a warped bed, glass will help ‘even-out’ some of that warpage making bed leveling easier. PEI will contour to the bed surface and bed leveling may not be as easy, so for someone new to 3d printing this option might not be the best course of action. I have a video that describes PEI and glass beds in more detail that can be found below.
The Aquila S2 comes stock with a PEI flex sheet system.
Difficulty: 1-5 = 1 the hardest part is getting the magnet to stick smoothly to the bed, but even that isn’t too hard.
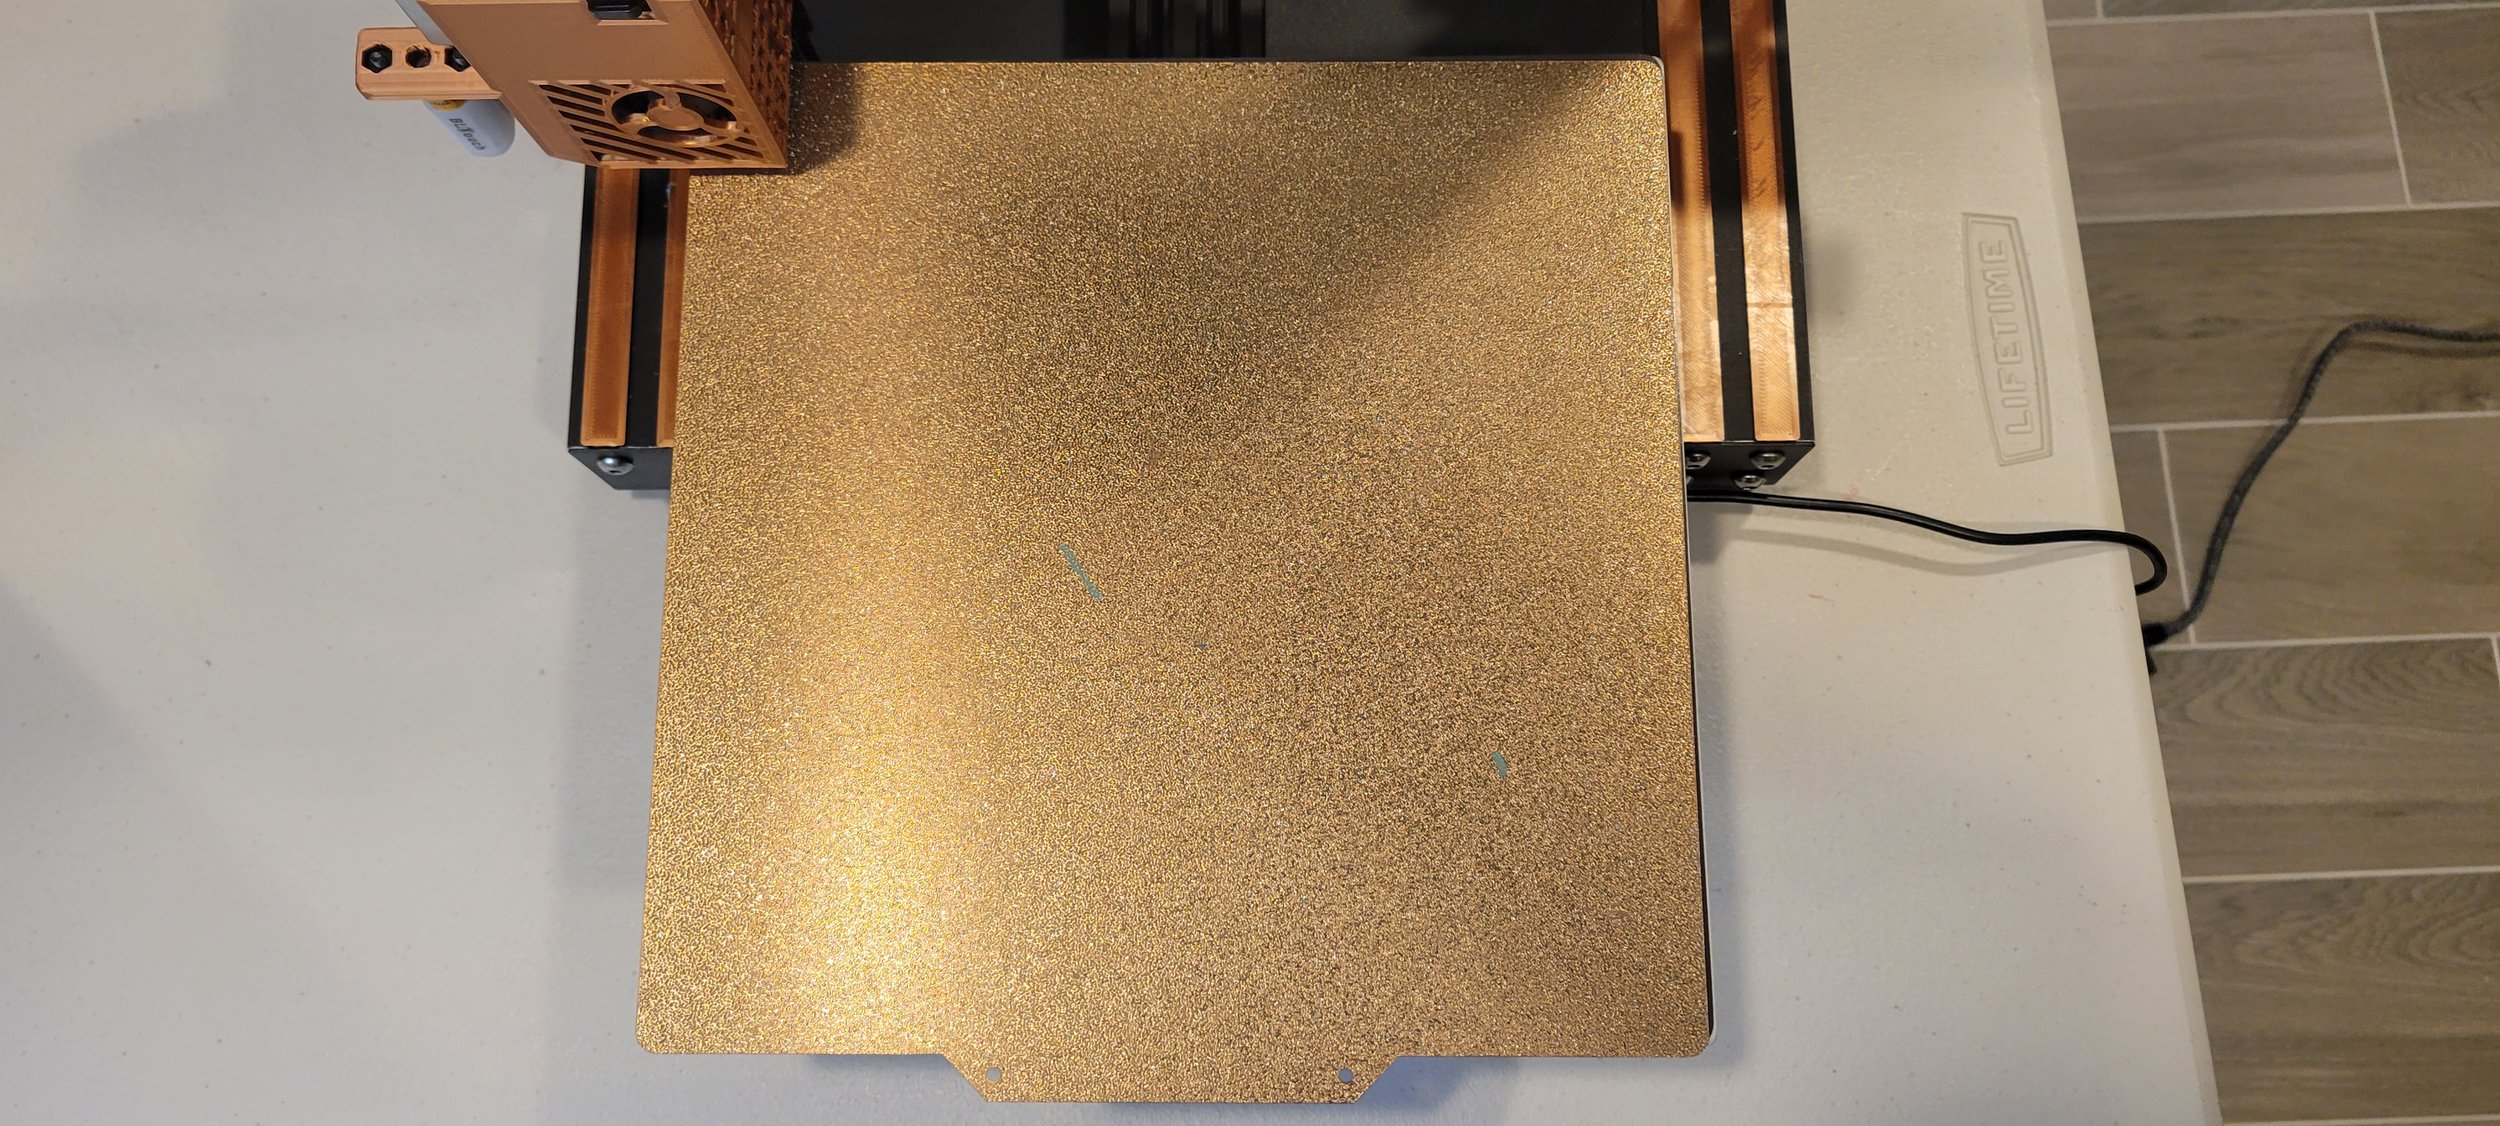
A textured PEI sheet
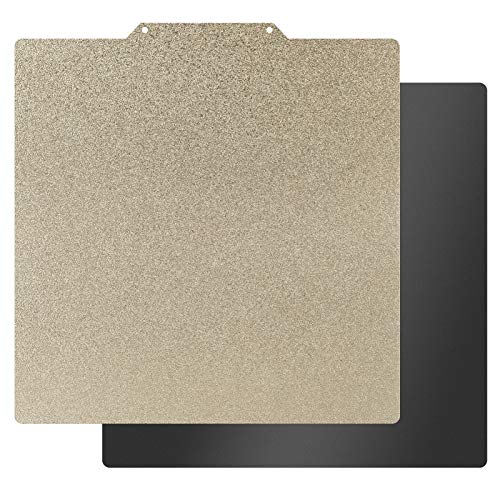
When purchasing for the Aquila, buy a sheet that has the size of 235x235
PEI video that discusses two separate types of PEI sheet, the installation, and the advantages/disadvantages over the stock glass bed.
Auto bed level probe: BL Touch CR Touch

This is an amazing tool that can help you get great quality prints, but it’s not a magic fix. Auto bed leveling(ABL) probes DO NOT LEVEL YOUR BED. That’s an important concept to understand because the name is misleading. You still need to level your bed manually (although the amount of time doing this will be far less). What an ABL probe does is take height measurements of the bed in various places, then using those data points it creates a virtual topography of the bed contours. That topography is known as a Mesh. This mesh is used to move the nozzle closer or farther from the print bed as it moves along the contours of the bed surface while printing. The print bed will never be truly ‘level’, and if your bed is warped it’s even harder to get there, the ABL probe takes up small to moderate deficiencies in leveling and helps to print A FLAT FIRST LAYER, which increases print consistency and adhesion. It does this for several layers and slowly Fades out, no longer applying the mesh. There are several option of probe:
Antclabs BL Touch - This is the original BL touch option and is an amazing choice. These are reliable and work as well as any other on this list. This probe uses a hall effect sensor (magnet) to take its data points and has a plastic probe arm.

Official BL Touch probe form Antclabs

BL touch clones - There are a wide array of BL Touch clones. The ones I linked have performed as well as the original at a reduced cost. All the clones operate in the same manner and have the same(or similar) dimensions so they will fit into any shroud or holder that can fit a BL Touch.
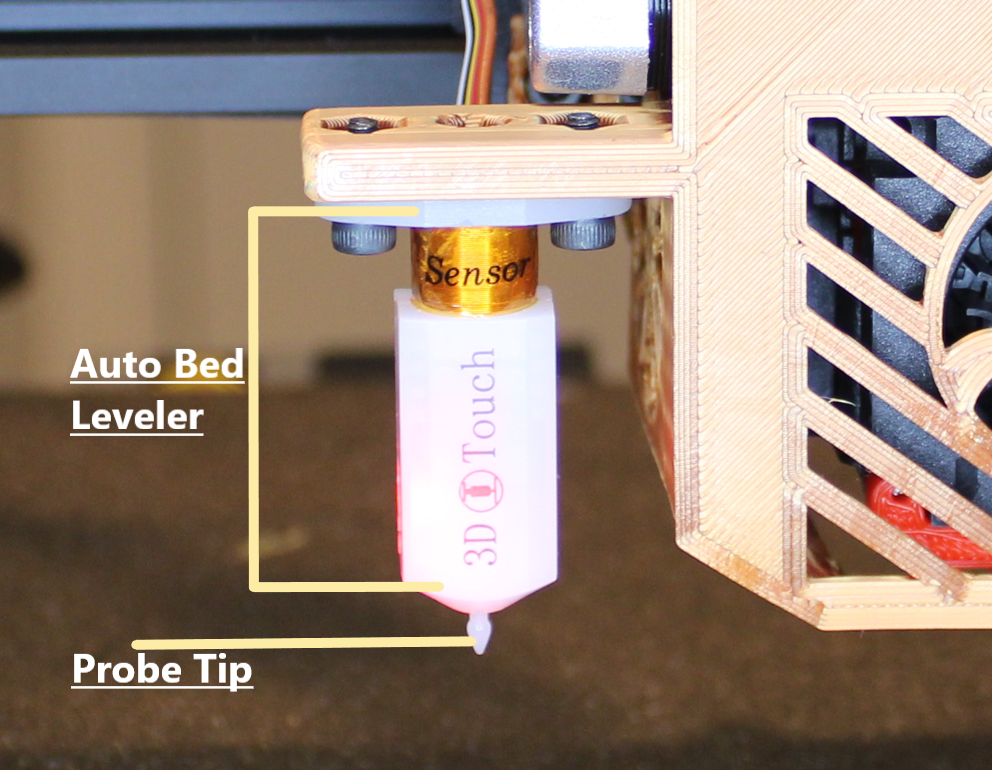
One of the many ABL clones, the 3D Touch.

CR Touch - This is Creality’s version of a BL Touch and its looks aren’t the only difference. Probe works with an optical sensor instead of the magnetic Hall sensor, and has a metal probe arm. The optical sensor should be more accurate, but having used the BL Touch, Bl Touch clones, and CR Touch I can’t say any one has out-performed another.
1-5 = 4.5 This is a two part installation. The first is physically hooking up the wiring to the mainboard, which really only means plugging it in. The second part is the hardest because it will require a firmware update. The firmware requirements are no different for the CR touch than the BL Touch, however they do require different mounting options.

A CR Touch attached to the Creality Sprite Extruder.

My video goes over the entire process of setting up a BL Touch: from mounting the unit, to the firmware, it’s all covered!
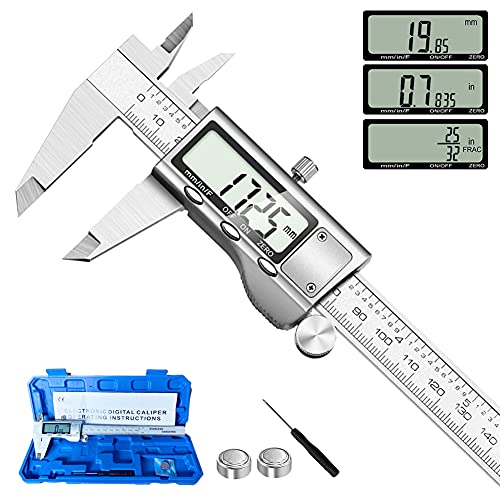
Digital Calipers

Besides the several calibration prints(below) that require measuring, there will be a plethora of other times you will want to measure an object, and a good pair of digital calipers will pay dividends. You want to make sure they are accurate up to 0.01mm to make them worthwhile.
Difficulty: 1-5 = 1 Just buy ‘em!
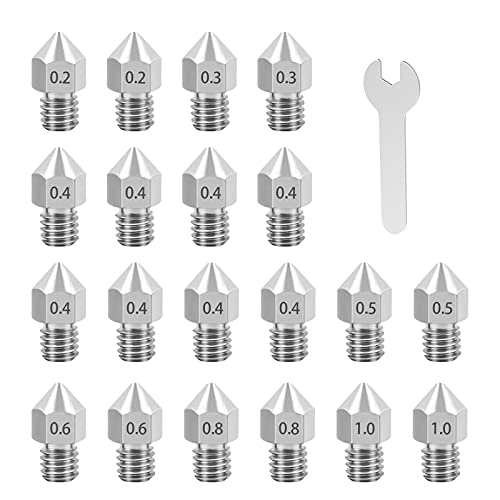
Spare Nozzles (assortment)

Having replacement nozzles on hand is always a good idea. The stock nozzles are made of brass which is a soft metal. After some time the bore of a brass nozzle will begin to wear and inaccurate extrusion can occur. The amount of time between nozzle changes is dynamic, as there is no mileage on them, just be aware that at some point it will need to be replaced. If you’re using abrasive filaments they can significantly wear a brass nozzle and may need to be replaced immediately after printing. Abrasive filaments include: Wood filament, Glow in the dark filament, ‘filled’-filament, carbon-fiber filled, marble-filled, etc.
Brass - The best all around nozzle material. Gets hot quickly and melts filament quickly. Cheap to manufacture.

Stainless Steel - Slightly harder than brass, so can do some abrasives without having to change. Can produce ‘food-safe’ models, but there is a lot more work you’d need to do to get your model there. Heats slower than brass and melts filament slower, so may need slightly higher printing temps.
Hardened steel - hardest nozzle type, can print abrasives day and night without having to be replaced. Heats slowest and melts filament slowest. May need to significantly increase temperatures when printing.

Copper - Similar to Brass. Heats very quickly and gives heat very quickly. Often comes plated in Nickel, which prevents, to some degree, filament from sticking to it.

Difficulty: 1-5 = 3 Replacing a nozzle is pretty straightforward but certain steps need to be maintained or else you can damage your hotend, or worse, your mainboard. You never want to touch your heating block while the printer is powered on. If you make contact with the thermistor/heating cartridge wires you can short them out, which can damage the mainboard. Overtightening a nozzle can also crack it off within the heating block which is not fun to remove or replace. I go over this procedure in my Bi-Metal heatbreak video found HERE.